Facebook Pixel Skip to main content

📣SCRIPT SALE! Treat yourself to an easier Fall. Save 30% on 5+ perusal scripts with code SPRING30 before May 3 and head into summer stress-free.

Exercise

Distance Learning: Larger Projects and ISPs
Classroom Exercise

Distance Learning: Larger Projects and ISPs

The exercises listed below can be adapted to distance and online learning opportunities. Students work individually (rather than with partners or in groups). Group work and discussions can be completed using video conferencing programs (such as Google Hangouts, Skype, or Zoom). Written work can be submitted electronically via email or uploading to Google Drive or similar. Performances can be done live via video conferencing programs, or filmed on a smartphone or digital camera and uploaded to a service such as YouTube or Vimeo (privacy settings can be adjusted to accommodate your school’s internet safety policies). Check out our round-ups of exercises for Vocal and Physical Performance, Monologue and Individual Performance, Playwriting & Written Drama and Analysis and Technical Theatre as well. Larger Projects / ISPs (Independent Study Projects)These are longer assignments that may be used as independent study projects (ISPs) or longer-range group assignments. With distance group projects, students should devise a way to divide up the work equally and can come together to discuss their work via video conferencing. Groups can use project management programs such as Basecamp to assign specific tasks and due dates to each other, and mark them as complete as they go. Written assignments can be submitted via email or Google Drive, and group oral presentations can be done via video conferencing with the teacher. Directing Challenge: - Script Analysis for Directors, Part 1: Scanning the Script - Script Analysis for Directors, Part 2: Going Deeper - Communicating Your Directing Vision Through the Senses - How to Pre-Block a Scene - Problem-Solving for Student Directors - Casting Challenge: Not Enough Actors! - Casting Challenge: Too Many Actors! Global Citizenship Challenge: - Global Citizenship in the Drama Classroom - Global Citizenship: A Cross-Curricular Opportunity Looking Back and Looking Forward Students will look over what they’ve learned and create a manual for future drama students Pitch Your Project: A Cross-Curricular Performance Challenge Putting on a Class Production Challenge: For this exercise, you might have every student select a monologue on a specific topic and then create a livestream for the public to watch. Alternatively, you could go through the process of producing a hypothetical show. • Part 1: What to Produce? • Part 2: Who Does What? • Part 3: Casting • Part 4: Problem-Solving • Part 5: Post-Show Reflection Staging Your Show: “Same Show, Different Stages” The Three-Dimensional Theatre History Project
Technical Theatre Exercises: For the Classroom & Beyond
Classroom Exercise

Technical Theatre Exercises: For the Classroom & Beyond

The exercises listed below can be adapted to distance and online learning opportunities. Students work individually (rather than with partners or in groups). Group work and discussions can be completed using video conferencing programs (such as Google Hangouts, Skype, or Zoom). Written work can be submitted electronically via email or uploading to Google Drive or similar. Performances can be done live via video conferencing programs, or filmed on a smartphone or digital camera and uploaded to a service such as YouTube or Vimeo (privacy settings can be adjusted to accommodate your school’s internet safety policies). Check out our round-ups of exercises for Vocal and Physical Performance, Monologue and Individual Performance and Playwriting & Written Drama and Analysis Exercises as well. Technical Theatre ExercisesThese technical theatre exercises sometimes require a bit of adaptation or creativity to complete, but most can be done at home and submitted in a variety of ways, including via submitting a PowerPoint presentation, submitting digital photographs of physical creations (such as costumes or props), or presented via video conferencing. Many group exercises can be completed individually, with allowing more time for students to complete the tasks outside of class time. Since you are doing learning by distance, in many cases, your students will be doing their projects for a fictional or hypothetical production. 1. Costuming Your Show for $50 or Less 2. Create a Costume Vision Board Focus on the “Digital” vision board suggestion, using Pinterest or Photoshop. Alternatively, students can create physical boards and photograph them, or present via video conferencing. 3. Creating Atmosphere Using Music 4. Found Objects You can adapt this exercise by having students present monologues and use objects and clothing/costumes from their own homes 5. Getting Other Departments Involved in Your Production (Producing) Focus on the “ask” letter 6. How to Create a Budget When You’ve Never Done It Before (Producing) 7. How to Create a Master Props List 8. How to Create a Program for Your Production (Producing) 9. How to Prepare a Stage Manager’s Prompt Book 10. Lighting and Sound = Ambiance 11. Rehearsing In Layers (Directing / Stage Management) Students will practice creating a rehearsal schedule for a hypothetical show 12. Respect the Tech! A Technical Performance Challenge Students will create individual performances using items from around their homes 13. Shakespeare Set In Another Time (Design) Focus on DESIGN activity 14. Taking on the Producer’s Role: Elevator Pitch 15. Telling the Story Through Clothing: Choosing a Colour Palette for Your Show 16. The Running List: What It Is and Why You Need It (Props / Backstage) 17. Using One Item to Show Character (Costumes) Focus on THEORETICAL activity 18. 5 Props Challenges and How to Overcome Them Focus on prop problem-solving challenge (giveaway) 19. 10 Ways to Publicize Your Show (Publicity / Producing) Create a hypothetical show and challenge students to figure out how to get the word out.
Distance Learning: Playwriting & Written and Analysis Exercises
Classroom Exercise

Distance Learning: Playwriting & Written and Analysis Exercises

The exercises listed below can be adapted to distance and online learning opportunities. Students work individually (rather than with partners or in groups). Group work and discussions can be completed using video conferencing programs (such as Google Hangouts, Skype, or Zoom). Written work can be submitted electronically via email or uploading to Google Drive or similar. Performances can be done live via video conferencing programs, or filmed on a smartphone or digital camera and uploaded to a service such as YouTube or Vimeo (privacy settings can be adjusted to accommodate your school’s internet safety policies). Check out our round-ups of exercises for Vocal and Physical Performance and Monologue and Individual Performance as well. Playwriting Exercises
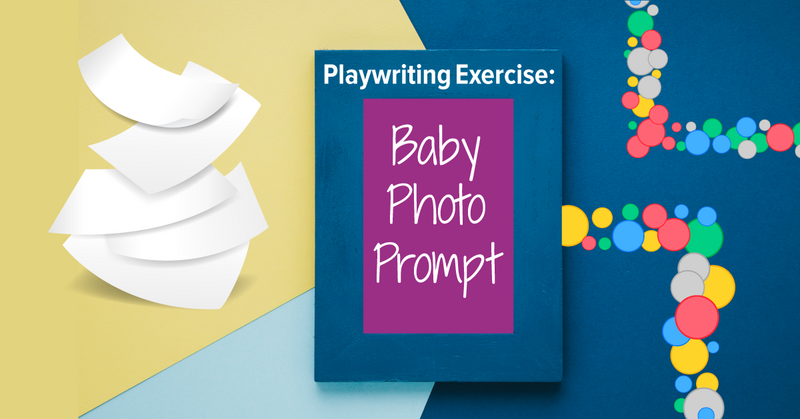
Playwriting exercises are great because they can be completed anywhere a student has access to a computer or tablet. They can also dictate their writing using speech-to-text software. Playwriting assignments can be submitted electronically, and feedback can be added and sent back, or given verbally/in person using video conferencing programs. 1. A Character is Not a Whole Person 2. A Picture Tells A Thousand Words: Cross-Curricular Drama Classroom Project 3. Brainstorming in the Drama Classroom: Coming Up With More Ideas Than You Need 4. Exploring the Greek Chorus Students will write their own Greek chorus, narrating an everyday activity. Students can also perform their piece if you wish. 5. Same Character, Different Choice 6. Shakespeare’s Words: Iambic Pentameter 7. The 5 W’s and Playwriting 8. Tips for Giving Feedback to Student Playwrights Focus on Feedback Form exercise 9. Top 3 Ways to Write a Character Specific Voice 10. Using Statistics as Scene Starters Focus on Serious Statistics – A PSA Project exercise Written Drama and Analysis ExercisesLike playwriting exercises, students can complete written drama exercises anywhere they have access to a computer or tablet, and submit their work electronically. 1. Brainstorming as a Group: Add Three 2. Dealing With Difficult Characters: 3 Tips for Success Focus on Tip #3: Your character is not “you” list 3. Do You Know Your Character? 4. Ensembles Are Characters Too! Focus on Tip #1: Character profile 5. Making Assumptions About Characters 6. Nine Questions Actors Need to Ask Themselves 7. Prompting Creativity in the Drama Classroom 8. Question of the Day 9. Questioning Your Character (Without Judgment) 10. Same Lines, Different Meanings Note – partners aren’t necessary to complete these exercises 11. To Research or To Not Research? 12. What Does My Character Want? 13. What’s the Difference Between What Characters Want and Need? 14. What’s Your Character’s Signature Gesture?
Tech Exercises for the Non-Technical Teacher
Classroom Exercise

Tech Exercises for the Non-Technical Teacher

The phrase “technical theatre” can be intimidating for some drama teachers. They may feel that they don’t have adequate experience to teach technical theatre, or that they just aren’t “tech-y” enough to succeed in this area. Some teachers may also have a less-than-idea technical theatre situation in their school, due to budget restraints or lack of funding, outdated or non-existent technical equipment and technological resources, or unfortunate theatrical spaces (cafegymatorium, anyone?). However, technical theatre does not have to be intimidating, expensive, or state-of-the-art. Here are 15 examples of simple technical theatre exercises that you can do with your class. They don’t require a lot of equipment or extensive technical theatre knowledge – they’re more focused on using found materials and resources, a dash of willingness to experiment, and a dollop of creativity. They’re a lot of fun, too! 1. Have your students find and share YouTube clips of a scene from a movie, a television show, or a filmed theatre production that has interesting lighting. Discuss – what is interesting about the lighting? What made it stand out to you? How do you think they achieved that effect? How could you recreate that kind of lighting in your classroom or performance space? 2. Light a scene using only found lighting – overhead lights, cell phone lights, flashlights, light from a projector, fake candles, light from a window, etc. 3. Create a playlist of ten songs inspired by a play or musical that would be appropriate to use as pre-show or intermission music. For example, if your students are creating a playlist for a production of The Wedding Singer, they might choose popular wedding songs from 1985. However, students can’t use any music that is actually from the play or musical! 4. Create a soundscape, radio play style for a scene, using found objects within the classroom. 5. Use shoe boxes, popsicle sticks, magazine cutouts, and other craft materials to create diorama-style 3D scale model set designs. 6. Partner with the visual art teacher at your school and have them teach your students different scenic painting techniques, such as creating wood grain, brickwork, sand and stone effects with paint. 7. Create a costume colour palette for a show you’re studying. Have students explain how the colours they chose demonstrate different moods or character statuses. 8. Create a costume vision board for a show you’re studying. Divide students into small groups and assign each group a different character from the show. 9. Challenge students to show a character using only one costume piece. What costume piece would they choose and why? Take this challenge a step further and have students create or acquire the costume piece. Have one student model the piece for the rest of the class. (The rest of the costume should be basic black clothing pieces.) 10. Have students learn and practice how to take proper costume measurements. 11. Create and/or design a method for an organized props area. Use your own theatre space as a model and have students figure out the most effective use of the space. 12. Create a master props list for a show you’re studying. If you’re actually doing a school production, give the list to the props head to save them time! 13. Have students design makeup looks for a play you’re studying, using a blank face template. Take it a step further and have students try to create the makeup looks on each other with actual makeup. 14. Find three different recipes for stage blood and test them on different kinds of fabric to see which recipe is most realistic-looking and which one washes out the best. 15. Try the following exercises here on the Theatrefolk blog – all instructions included! • Found Objects • Respect the Tech! • Create a Program for Your Production • Costume Quick Change & Prop Switch Don’t forget to check out the Drama Teacher Academy for even more technical theatre lesson plans and classroom resources, as well as professional development courses to increase your technical theatre knowledge, skills, and confidence.
Distance Learning: Monologue & Individual Performance Exercises
Classroom Exercise

Distance Learning: Monologue & Individual Performance Exercises

The exercises listed below can be adapted to distance and online learning opportunities. Students work individually (rather than with partners or in groups). Group work and discussions can be completed using video conferencing programs (such as Google Hangouts, Skype, or Zoom). Written work can be submitted electronically via email or uploading to Google Drive or similar. Performances can be done live via video conferencing programs, or filmed on a smartphone or digital camera and uploaded to a service such as YouTube or Vimeo (privacy settings can be adjusted to accommodate your school’s internet safety policies). Check out our round-up of exercises for Vocal and Physical Performance as well. Monologue & Individual Performance ExercisesStudents can find and read scenes and monologues from a variety of online sources (such as right here on Theatrefolk’s Free Resources page), or with a public library card and the Libby app). Teachers may also wish to supply monologues for students. Performances can be prepared at home as homework, and performed live via video conferencing or recorded and submitted. Written reflections and practice/rehearsal journals can be assigned for students to document their processes. 1. Auditions Exercise Part 1: Perform on Video 2. Auditions Exercise Part 2: Mock Auditions 3. Connecting the Past to the Present: Modernizing a Scene All exercises can be completed individually 4. Creating Your Audition Toolkit – Monologues 5. Exploring Spoken Word Poetry This is a combination writing and performance exercise 6. “Let’s Try That Again”: Taking Direction in an Audition 7. 5 Tips for Preparing A Monologue With Confidence Focus on Tip #4: Record your performance
Exercise: Effective Peer Feedback
Classroom Exercise

Exercise: Effective Peer Feedback

Do your students know how to give effective peer feedback? If not, they may not know what that actually looks like. If they don’t know what effective peer feedback is, how can they benefit from giving and receiving it? The following exercise will help your students identify effective peer feedback, and then practice giving effective feedback to each other. Part 1: What is effective peer feedback?1. Start with a group discussion. Ask your students to finish the following sentences: “Effective peer feedback is…” and “Effective peer feedback is not…” Write down their suggestions on a large piece of paper or whiteboard for the class to see. For example: • Effective peer feedback is… • Useful/meant to help students improve • Action-oriented (able to put the feedback to use next time) • Thoughtful • Specific • Unbiased • Effective peer feedback is not… • Rude or insulting • A means to put people down • Name-calling • Vague • Only complimentary 2. At some point, a student will likely suggest that feedback should always be positive. Ask your students: Is this true? Should feedback always be positive? Can feedback be negative? How can students phrase negative feedback in a way that isn’t hurtful? 3. Have students give examples of feedback for each suggestion. For example, the feedback “I enjoyed your performance” is flattering and nice to hear, but it’s not particularly useful. Students need to give specific feedback. They can certainly offer praise, but they need to specify what it’s for. What about the performance did your students enjoy? What did the performers do that worked well (that they can do again next time) or didn’t work well (that they can avoid or improve on next time)? Distance Learning Adaptation If you are able to share your screen, open a blank word processing document to record students’ suggestions for effective peer feedback. Alternatively, assign one student to act as scribe and have them take notes and upload them to the class website, or email them to the rest of the students. You can assign a different note-taker each class, or offer bonus marks for volunteering to take notes. Part 2: Putting it into practice1. Select an improv game, such as Scenes From a Bag. I like to choose an improv game that often results in funny scenes, so students are forced to actively observe and think about the scene, not just passively watch and laugh. (Of course, students can still laugh while they’re actively observing!) 2. Divide students into pairs, or let students select partners. 3. Select a pair to perform the improv game. 4. Tell the pairs watching to observe and think about what feedback they would give – one comment for each performer. You will pick a pair to give feedback directly to the performers. 5. After the pair performs, select another pair to give the performers feedback. Each partner will give two pieces of feedback – one for each performing partner – for a total of four pieces of feedback per pair. All feedback must fit the “effective feedback” criteria that students identified in Part 1 – specific, thoughtful, useful, etc. 6. The pair giving feedback then becomes the performing pair, and another pair becomes the feedback pair. Continue until each pair has had the opportunity to perform and give feedback. 7. After all students have performed and given feedback, they will complete individual reflections. Distance Learning Adaptation Follow the game instruction as written, using a video conferencing program such as Zoom. For giving feedback, choose one of the following options: • Have pairs perform and give feedback verbally, live in front of the full class; • Have pairs perform live in front of the full class, but type up feedback and email it to their assigned pair (copying you in on the feedback) • Rather than rotating pairs as originally directed, group two pairs together into groups of four, and assign each group of four a virtual meeting room where one pair can perform and the other pair give feedback, and then the pairs will switch.
Round-Up: Warm-Up Activities that Encourage Communication
Classroom Exercise

Round-Up: Warm-Up Activities that Encourage Communication

In this round-up, we’ve gathered a whole host of useful warm-up games that you can use in your drama classroom that focus on different aspects of communication. Communication isn’t just students talking to each other – it encompasses many different ways of sharing stories, thoughts, ideas, and feelings. Vocal Technique & ClarityWe’re starting with the basics – vocal technique and clarity. If your students are speaking too quickly or garbling their words, the audience won’t be able to understand the story they are trying to communicate. A simple, yet effective warm-up for vocal technique and clarity is to recite the alphabet out loud, as a full group, in a slow, over-enunciated, and exaggerated manner. Have students open their mouths and eyes wide, and really focus on drawing out every single sound from each letter. And yes, you will all look silly together! For an additional challenge, once you have gone through the alphabet once slowly, you can either speed up the tempo of the group alphabet (without losing any clarity), recite the alphabet backwards, or have students do a gesture (such as bending their knees or clapping their hands) on every third letter. Try these warm-ups too: • A Vocal Workout for the Articulators • Tongue Twister Teamwork (and other exercises) • Breath Control for Actors & Singers • Listening / Teamwork Tongue Twister Exercise Active ListeningAre your students listening to understand, or are they just waiting until they get to speak again? Active listening is a huge part of effective communication. There is nothing more frustrating than talking to someone and feeling like you aren’t being listened to. Here’s a fun warm-up game for students to practice active listening while practicing their improvisation skills. Have students sit or stand in a circle. Going around the circle, give each student a number in succession – 3, 5, and 7. Give the students a topic to talk about or a story starter prompt. The first student starts the story with 3 words, the second student continues with 5 words, the third student continues with 7 words, the fourth student continues with 3 words, and so on. It’s up to you to decide whether the story should be silly or serious. For example, here is a story about birds: Student 1: A bird named Student 2: George decided to go to Student 3: South America to visit his friend. So Student 4: he purchased a Student 5: ticket for the train. However, Student 6: once he arrived, he realized he forgot Student 7: his favourite suitcase. Students need to listen to each other to continue the story in a way that makes sense. Feel free to mix up the number of words each student gets to use. Try these warm-ups too: • Listen! Focus! • Three Things in Common • Shakedown / Numbered Bodies / Numbered Tableaux • The End of the Word (and other exercises) Nonverbal CommunicationIt’s not just about what your students say, it’s how they portray it with their bodies and faces. Try this warm-up exercise (which is also great for working on active listening). Narrate a simple, yet descriptive story of a student walking to school. While you are narrating the story, have students move about the space, acting out their interpretations of what you’re describing. For example: “You exit your house and lock the door behind you. You heft your backpack across your back. It’s heavy with textbooks and binders, but it’s a nice sunny day with a slight breeze. You’re feeling good – your homework is done, you’ve packed a lunch, and you’re wearing your favourite shirt. As you’re walking, you notice a strange feeling on your foot. You pause and look at the bottom of your shoe and see that you’ve stepped in a large wad of gum. You don’t want to touch it with your hands, so you try different ways to scrape it off, but it stays stubbornly stuck. While you’re trying to get rid of the gum on your shoe, you notice an odd, wet feeling on your back. You look behind you and notice that your water bottle is leaking through your backpack onto your clothes…” And so on! Make the story as long or short as you need to for the warm-up. Try to leave your descriptions clear enough for students to come up with ideas on the fly, but open enough for students to come up with creative ways of acting out your narration. Try these warm-ups too: • Who’s Knocking? • Silent Line-Up Game • Magic Putty • Nonverbal Emotions (and other exercises)
Exercise: Problem-Solving for Student Directors
Classroom Exercise

Exercise: Problem-Solving for Student Directors

Giving students the opportunity to direct is a great thing – it helps them to develop their leadership skills and creative thinking abilities, challenges them in a new theatrical medium, and helps them gain lots of new, transferrable skills, such as problem-solving. However, being in a leadership position can be nerve-wracking for students. They may have limited experience with being the person in charge and may try to shy away from making tough decisions or dealing with difficult situations that arise, especially those that involve fellow classmates and friends. As teachers, we need to encourage and empower our students to have the confidence to believe in themselves, make decisions, and stick by them. We must be available to our students, should they need help. At the same time, we also need to step back and avoid the temptation to “fix” everything and solve problems for our students. Being able to deal with different situations is an important life skill that students need to develop. Before assigning scenes and discussing dramatic intention, try this exercise with your students. This exercise gives students the opportunity to dip their toes into problem-solving – first as a group and then individually with an Exit Slip. With the full class, introduce the idea of student directors and discuss what a director does and is responsible for. Part of a director’s job, aside from creating and executing the overall vision of the show, is to solve problems on the fly. Describe problems that you have had to deal with as a teacher and director and explain how you solved them. You may also wish to describe some fears and concerns you had as a new director and how you dealt with those fears. Then, in smaller groups (four to five students per group), share the scenarios below. You may choose to have all groups work on the same scenario, or assign each group a different scenario. Give students some time to brainstorm ideas on how they could approach each situation and come to a positive conclusion, or take steps to solve the problem. (You may wish to do one scenario together as a full class first, as an example.) Groups can then share their ideas with the class or, if time allows, groups can present a short scene demonstrating the problem and their solutions. Scenarios1. Your teacher assigns you a scene to direct in class. You’ve never directed anything before and you feel nervous. You’re feeling especially nervous because you have never before heard of the play that your scene is from. What would you do in this situation? 2. You are trying to figure out which classmates to cast in the various roles of your scene. Both Alex and Mina would be equally excellent in one particular role. What would you do in this situation? 3.After you’ve completed your casting and released it, Una comes up to you angrily with a complaint that you cast Rob and Will, your two best friends in class, as the leads in your scene. Una feels that you’re playing favourites. What would you do in this situation? 4. It is getting very close to showtime and John is still not off-book. Other cast members have expressed concern that John won’t be ready for opening. What would you do in this situation? 5. Monique and Yumi show you the set piece they have been working on and are very proud of. However, it is not even close to what you had envisioned this piece to look like. What would you do in this situation?
How to Create a Program for Your Production
Production

How to Create a Program for Your Production

Show programs (also known as playbills) are the easiest way to share important production information with the audience. Programs are a method of acknowledging all the hard work done by the cast and crew to bring the production to life. They also make a nice souvenir for audience members after the show. Programs should be visually appealing, easy to read, and succinct, while including all the necessary personnel information and proper credits. Programs can be as simple as a one-page flyer or as elaborate as a fully illustrated booklet. Programs can also be themed towards the production – for example, a production of Newsies might want to make their program look like a newspaper, while a production of Treasure Island might make their program look like a pirate’s treasure map – or in a completely different medium entirely, such as a display board, or even a digital program that patrons can access on their cell phones. There are online resources for creating and printing programs, such as Playbillder, but teachers and students can also create a simple program themselves by using a computer program such as Word or Publisher. Exercise:In this exercise, students will create a traditional printed program for their actual upcoming production or class performance, or they can create a program for a fictitious production. The program will be printed and submitted on a minimum of one standard sheet of 8.5” x 11” paper, folded in half (front cover, inside left cover, inside right cover, back cover). Additional pages are optional. The cover and any images or photographs should be in colour. Spelling and grammar definitely count! What to include: • Show title and graphic (for the cover) • Show dates and times • Location of performance • Production credits (playwright/book writer, lyricist, composer, and any other important credits that were indicated when you purchased the rights to the show – these credits cannot be omitted!) • Director’s note and/or brief summary of the show • Cast list with actors’ names and role(s) • There are many different ways of crediting the performers! • Alphabetical by actor’s last name • In order of appearance • In order of speaking • In groups (for example: “Kansas,” “Munchkinland,” “Forest,” “Oz” in The Wizard of Oz) • Size of role (I try not to use this ordering method if I can help it, as it encourages a “leads are more important than the ensemble” mindset.) • Whatever order you choose for crediting the performers, be sure to indicate this order underneath the “Cast” title, for ease of understanding. • Crew list, including all artistic staff members (producer, director, musical director, choreographer), stage management team members, assistants, designers, operators, band/orchestra members, and additional crew members • Special thanks to anyone who assisted with the production (such as rental sources, dramaturgical assistance, people or companies who donated items or services, financial sponsors, etc.) Optional (include at least two): • Cast and crew headshots and biographies • Scene and/or song breakdown • Principal’s message • Advertising spaces or “good luck/break a leg” messages from friends and family (can be sold as a fundraiser) • Additional photographs (cast, crew, performance photos) • Blank page for autographs • Advertising for an upcoming production or special event
Can You Hear Me Now? A Peer-Led Volume Exercise
Acting

Can You Hear Me Now? A Peer-Led Volume Exercise

Isn’t it funny how some students are loud and enthusiastic during break time, but once they’re onstage, their voices seem to disappear? No, you haven’t lost your hearing – it’s one of the many mysteries of working with students in the theatre. Students don’t always believe their teacher when they say, “You need to be louder!” or “I can’t understand what you’re saying!” However, the following exercise will help provide an alternative solution to this problem, as it focuses on peer evaluations. Hearing feedback from a peer is always different from receiving feedback from a teacher! In this exercise, students will rotate through performing their lines onstage and receiving feedback, and then observing others’ performances and giving feedback to their peers. Materials Needed:• Lines from a show/scene your class is currently studying, or a brief monologue (can be different for each student, or have all students present the same lines). For this exercise, it is best if the lines are memorized in advance, but this exercise can also be done “on book.” • If you’re looking for material, we’ve got free monologues you can use for this exercise. • Peer Evaluation Sheet (Don’t miss the giveaway at the end of the blog!) Instructions:• Students will take on two roles within this exercise – performer and peer evaluator. • For this exercise, it is better to not let students choose their partners. Draw partner names out a hat or have them go alphabetically. • One partner (the performer) will stand on the stage or in the centre of the classroom. The other partner (the peer evaluator) will stand at the back of the room or auditorium. • The performer will present their lines out loud, while the peer evaluator makes notes on the Peer Evaluation Sheet. Peer evaluators will focus on volume (soft versus loud), diction (clear versus unclear), and speed (too slow, too fast, or just right!). • Then students will switch roles, so each has the opportunity to perform the opposite role of performer or peer evaluator. • After all the performances have taken place, students will receive their feedback forms and complete a brief Reflection. • Alternative: You may wish to have students rotate between roles, rather than have partners evaluate each others’ performances. In this case, create a running order (the simplest version is going through the attendance list from top to bottom): Student A starts as evaluator while Student B starts as Performer. After B performs, they move to the evaluator role, while Student C steps up to become the performer, and so on. Student A would be the last to perform. Optional Class Discussion Questions:• How did you feel when you were evaluating your classmates? Was giving feedback easy or hard? • Was it difficult to focus on just the technical performance of the monologue/lines, rather than on the content? Why or why not? • In your opinion, is it easier to evaluate your friends, or a random classmate? • What are some tips that would help students improve the volume, diction, and speed of their monologue/lines? • Is there such a thing as being too loud onstage? Why or why not?
Exercise: Same Lines, Different Meanings
Acting

Exercise: Same Lines, Different Meanings

One of the exciting aspects of rehearsal is experimenting with the text of the script and figuring out what the characters are saying and how they should say it. Each approach to the text will differ from student to student, actor to actor, and director to director – and that’s what makes theatre so interesting! Here are three fun exercises that allow students to explore different ways of approaching their lines and thinking about the emotions behind them. These exercises can be used in rehearsal as well as in the drama classroom, for students to try different ways of presenting their characters’ lines. Exercise 1: Emphasis1. Students will select a partner. 2. Select one line from a play, or use one of the sample lines provided (found in the handout). 3. Count how many words there are in the sentence. For example, the line “Can you help me please?” has five words. 4. Write out the line as many times as there are words in the sentence. From our example, students will write the line out five times. 5. For each sentence, underline a different word. - Can you help me please? - Can you help me please? - Can you help me please? - Can you help me please? - Can you help me please? 6. Say the lines out loud one by one, emphasizing the underlined word. 7. How does the emphasis of the different words change the meaning of the line? Note the differences in tone and emotions. Exercise 2: Emotion1. With the same partner, students will brainstorm a list of ten different emotions/feelings (for example: happy, sad, surprised, angry, bored, exhausted, annoyed, ecstatic, disgusted, hopeful). 2. Using the same line (“Can you help me please?”), students will say the line out loud ten times, using the ten different emotions they brainstormed. 3. How does the line meaning change when spoken with a different emotion? Does the line still make sense? (If it doesn’t, can you think of a reason or situation where the line would be said with that feeling?) Make note of these thoughts. Exercise 3: Sliding Scale Variations1. Using the same line, explore different ranges of emotions. For example: • Loud angry (screaming in rage) versus quiet angry (death glare) • Loud sad (sobbing) versus quiet sad (tears and silence) • Loud happy (screaming in delight) versus quiet happy (fainting away) 2. Try interacting with your partner in a scene, each feeling the same emotion but to the opposite extreme (for example, loud angry versus quiet angry). 3. Try a sliding scale of emotions. If “level 1 anger” is a silent death glare and “level 10 anger” is screaming in rage, what is level 3 on the anger scale? Level 5? How about level 8? 4. Use your senses. What do the emotions look and sound like? For example: “loud angry” might involve yelling and screaming, flailing, and pacing, while “quiet angry” might involve death glares, stiff posture, and clenched fists. 5. How do these different approaches to the text affect the meaning of the lines, as well as your performance? Reflect on your explorations. Distance Learning Adaptation All three of these exercises can be practiced and performed using video conferencing programs. The focus will be on rotating volunteer performers (rather than pairing up) and having the rest of the group observe and analyze the performances. Decide whether you wish your students to report their observations verbally in a class discussion, or if you want your students to submit written observations. Exercise 1: EmphasisHave one student say the selected line out loud as many times as there are words in the sentence, emphasizing a different word each time. Observe: • How does the emphasis of the different words change the meaning of the line? • Which emphasized word makes the most effective line? Why? • If the selected line is from a play, compare the line out of context (by itself) to the line when it’s in the context of the scene. Does the same emphasized word work? Why or why not? • If the selected line is not from a play, invent a line to come before and after the line. Does the same emphasized word work? Why or why not? Exercise 2: EmotionAs a group, brainstorm ten different emotions/feelings. Have one student say the selected line out loud ten times, using the ten different emotions that were brainstormed. Observe: • How does the line meaning change when spoken with a different emotion? Does the line still make sense? • If the line does not make sense, think of a reason or situation where the line would be said with that feeling. Exercise 3: Sliding Scale VariationsUsing the selected line, have students explore different ranges of emotions. First, choose two students to try two wide ranges of emotions: loud angry versus quiet angry, loud sad versus quiet sad, loud happy versus quiet happy. Second, choose five students to try ascending the range of emotions: the first student starts with “level 1 anger” and the last student will finish with “level 10 anger.” The three middle students need to figure out how to increase their levels of emotion without going too big or too small. Then, choose five students to try descending the range of emotions, from level 10 to level 1. Observe: • How does the level set by the first student affect the rest of the students when ascending or descending the emotions? • When analyzing a script, how do you determine how big or small your emotions need to be? What factors affect your choices? • What gestures, postures, and facial expressions can help demonstrate the emotion you are trying to portray? • How do these different approaches to the text affect the meaning of the lines? Overall Observations: How does these exercises help you to become a better actor? How can you use these exercises in rehearsal for a show? How do strong emotional choices by actors make a scene or show more interesting to watch?
Dancing in the Drama Classroom: 3 Ways to Get Started
Classroom Exercise

Dancing in the Drama Classroom: 3 Ways to Get Started

For those students who love dancing, simply mentioning the word “dance” gets them up on their feet and immediately moving. For other students, the idea of pirouettes, step-touches, and fan kicks causes them to break out in a cold sweat. Dancing is fun, a great way to exercise, and a wonderful way to express feelings and emotions onstage, but it can be intimidating for students with two left feet – or even students who are good dancers but lack confidence. Here are some tips for providing more leadership and growth opportunities for your dance enthusiasts, and to encourage your less dance-inclined students to dip their toes deeper into the dancing pool. 1. Start with those who love danceFirst and foremost, if you are working on a class production and have students who absolutely love dance, that is an ideal opportunity for you to get those students more deeply involved. You can have them work with the choreographer of the show: first by shadowing to learn proper warm-up techniques, how to explain the moves to the other students, and how to give corrections and feedback. (If they have a background in dance already, they may already have this knowledge.) You can assign “dance captains,” and have those students lead warm-ups and rehearse choreography while other students are working on other tasks. From there, if you have some really skilled and enthusiastic students, have them choreograph a part of the show. Perhaps they can work on a dance break during a song, a transition to cover a scene change, the sequence of bows, or even a brief number within the show. Have the students plan their choreography in advance (either by writing it out on paper, or filming themselves doing their choreography) and show it to you. If it works with your vision for the show, then they are good to teach it to the rest of the cast! Be sure to credit their work in the program (such as “Monkey Around choreographed by Susan Martin and Kyle Reeve”), and let them film the cast doing their choreography, so they can have a recording of their work. 2. Use movement to tell a storyWithin the classroom, challenge your students to think of dance as just another way of telling the story. Compare dancing to singing in a musical – why do characters break out into song? It’s because the character’s emotions and feelings are so strong they can’t just speak the words. It’s the same with dance – it’s another way of conveying emotions, feelings, and advancing the story. Dance is also so diverse. It doesn’t always have to be all jazz hands and grapevines – it could be a series of interesting movements or lifts, it could be inspired by martial arts (like tai chi), it could be a stylized way of entering and exiting, it could be a dance fight… there are lots of possibilities. Have your students brainstorm a list of different ways that dance could be used beyond just the traditional “song and dance” style of performing. Have them think of it as creative movement, if they need to. Speaking of diversity, there are so many different styles of dancing to explore. How could these different styles be incorporated into theatre? Perhaps your students claim not to like dancing only because they haven’t found a style they like. Your students might like hip hop, highland, popping and locking, ballroom, or ballet. Encourage them to explore different styles of dance – have them watch YouTube videos of different styles, and see how they might incorporate those moves into a show or scene. Or perhaps they might see two dance styles they like, and combine them together to make a unique hybrid style! (A tap dancing tango? Why not?) 3. Mini Exercise: Flowing Frozen PicturesStudents will create three frozen tableau scenes to tell a story (the beginning, the middle, and the end of a scene), but, rather than breaking the scene and just moving in a quick and neutral fashion to set up for the next scene, students will find a way to transition from scene to scene using flowing, dance-inspired movements. Have students hold the first tableau for five seconds, and then move slowly and smoothly (tai chi speed) for ten seconds to their second position. Students must keep moving for the entire ten seconds until the second tableau, then hold that pose for five seconds. And then, again, take ten seconds to flow their movements into the final frozen picture. Ten seconds doesn’t seem like a lot of time, but when moving from frozen picture to frozen picture, it’s quite a long time! Encourage students to move their bodies in interesting and varied ways – use turns, levels (high/medium/low), reaches, stretches, and so on. Feel free to set the scenes to music if you wish!
What’s Your Character’s Signature Gesture?
Classroom Exercise

What’s Your Character’s Signature Gesture?

What is a signature gesture? It’s a nonverbal, repeated movement your character is known for, that you perform in a particular way that is unique and identifiable. Common, well-known gestures include the thumbs-up/thumbs-down, the peace sign, air quotes, shrugging, pointing, eye rolling, saluting, and tipping your hat. The list goes on and on! Some famous examples are Matilda’s defiant power pose (hands on hips, feet splayed, face in profile), Hamilton’s triumphant fist punch towards the sky, the cocky hair-combing of the T-Birds in Grease, and J. Pierrepont Finch’s fourth-wall–breaking look towards the audience in How to Succeed in Business Without Really Trying. TaskHave your class brainstorm a list of well-known physical gestures. How many can you name? What do they mean? Do they mean different things to different people? Why use gesture?So why should you create a signature gesture for your character? For starters, it creates an interesting physical layer to your character. A signature gesture helps to identify your character from the others through their unique movement, and defines your character as someone different from you, the actor. It shows off your character’s personality. For example, eye rolling immediately identifies you as impatient, a high-five indicates a playful personality, and a firm, close-up handshake demonstrates a person not to be messed with. Some gestures can indicate multiple personality traits. For example, a pointed figure could indicate someone of a scolding or authoritative nature (such as a parent or a teacher), but it could also be used by a helpful person giving directions. Conversely, different characters might have similar personality traits, but use different gestures to demonstrate them. A well-placed smirk and shrug of the shoulder can be flirtatious, but so could a raised eyebrow, a wink, or a hair toss. Signature gestures also give the audience something to look forward to. When your character enters the stage, the audience will immediately be drawn to you, anticipating your signature gesture and when it will be used next. It creates a sense of familiarity and fun. TaskFrom your list of physical gestures, have your class identify a personality trait that goes with each gesture; for example, pointing = authoritative, thumb sucking = immature or babyish. Some gestures might work with multiple personality traits. How do you differentiate them? (Feel free to demonstrate the differences!) When should you use gesture?When should you use a signature gesture? The best times to employ your signature gesture are at significant moments in the show, to make your point stronger – such as a funny comment, a fit of anger, or as an exclamation at the end of a sentence – or on a repeated phrase or joke. Signature gestures are also commonly used on the “button” at the end of a song, where the music finishes. The High School Musical jump is a well-known gesture that is repeated in each of the films and stage musicals, and is always used on the button of the final song of the show. How can you find your character’s signature gesture? This is something you’ll explore during your rehearsal period and on your own time. Try different gestures to see what works for your character. Work with your fellow actors to ensure you are the only one doing your signature gesture, to keep your movement unique to your character. Or, look for places where others could “steal” or use your signature gesture – perhaps to taunt your character, to mimic your character, or to achieve or get something your character wants or has. For example, think of when Roxie Hart uses Velma Kelly’s gestures (such as crying into a handkerchief and fainting) while on trial in the musical Chicago – this prompts Velma to sing the song “Class.” Work through your script and note important or significant moments where your signature gesture could improve or emphasize what you are saying or doing. Ask for feedback from your director, to ensure that your signature gesture works for your character and doesn’t upstage you or the other performers. TaskHave your students come up with three possible signature gestures. Try using them during rehearsal. What feels most natural, and/or what looks best onstage. Distance Learning Adaptation 1. Have students list as many gestures as they can think of, such as pointing, raising an eyebrow, winking, tipping a hat, shrugging shoulders, and so on. 2. Have your class brainstorm a list of well-known physical gestures from plays, television shows, or movies. How many can you name? What do they mean? Do they mean different things to different people? 3. One at a time, have students perform the sentence “Hey, how’s it going?” using a different gesture. Each student should aim to do something different. Experiment with different gestures, and where in the sentence the gesture is used. For example: • “Hey” (finger point) “How’s it going?” • (wink) “Hey, how’s it going?” • “Hey, how’s it going?” (tip of the hat) Ask your students: Does the positioning of the gesture in the line change the meaning of the line or perception of the character? Does a different gesture change how it feels to play that character? Does adding a gesture make it easier to portray a mood or emotion? 4. Have students try performing the same sentence and gesture, but portraying different emotions (scared, flirtatious, angry, secretive, etc.). How does that affect how the audience (i.e. the rest of the class) perceives the character? 5. Try this exercise again with the following sentences: • “What do you think about that?” • “I have a fantastic idea.” • “It’s 9 o’clock… you know what that means.” 6. If you are currently studying a play in class, have students suggest signature gestures for the characters. Have them read lines from the play aloud and figure out where the signature gestures would be used in different scenes.
Reflection: Looking Back and Looking Forward
Classroom Exercise

Reflection: Looking Back and Looking Forward

After a production closes, reflecting on your process and thinking about the future are the natural next steps. They’re definitely an important part of the process, for you as a teacher and for your students. Reflections are intended as an opportunity to look back on your own personal thoughts about a particular topic – in this case, how students felt about their theatrical process. But this information could then be reshaped into something that would be very useful for incoming drama students – a way for the next wave of students to learn from their peers and for your current drama students to lead by example by sharing their lessons learned and shaping their learning experiences into useful advice. Here is an exercise your current students can use to reflect upon their experiences and new knowledge – and then to turn that information into a useful document for future drama students, such as a “drama transition manual” or a “what to expect during your production” brochure. Steps:1. Students will complete individual Reflections about their experiences and their feelings about their current production, based on this post. Be sure to include all students, whether their roles were onstage or offstage. 2. As a group, decide the following: • What format would you like to use for your document? Ideas might include a brochure for incoming drama students, a “drama class survival guide,” a transition manual, a production handbook, a top ten list, a video, a PowerPoint presentation, or an e-document that could be uploaded to a teacher website. • Which Reflection questions would be best suited to being adapted into advice? What is the most important information that you’d pass along? If you could share only one piece of advice or information, what would that be? • Will your document be text-based information only, or will you use visual content such as photos or videos? Or both? What are the advantages and disadvantages of your choice? • You may wish to have some students in charge of completing the advice portion , while others head up the design and/or production side of the document. Depending on the size of your cast and crew, you may also wish to separate your documents into “onstage” and “offstage” versions. 3. Compare Reflection questions to see if there are any common or repeated answers. Those should definitely be included in your document. 4. Using the Giveaway document, students will r e-format their selected Reflection questions into advice for future students. Students should try to write as if they were giving advice to a friend or a younger sibling. 5. Collect the written portions and assemble them into your selected document format. This could involve creating a written document, or having students present their thoughts/advice on video, or a combination of both. You may wish to include production photos as well.
Dealing With Nerves
Directing

Dealing With Nerves

Performing onstage with friends, family, peers, and even strangers watching can be extremely nerve-wracking. Putting yourself out there, being vulnerable, and taking risks onstage takes a lot of courage, which is why it’s common for student actors to be nervous before going onstage. They put pressure on themselves to perform perfectly. They don’t want to let their castmates and crewmates down. They want to remember everything they need to do out there – lines, blocking, entrances and exits, what costume they’re supposed to be wearing, their relationships to other characters…the list goes on and on. If your actors are having trouble calming their nerves, try using the following tips. 1. Set yourself up for success ahead of time.As the Scouts say, be prepared! Students should use their rehearsal time effectively and review on their own every day. They must practice good habits: learning their lines until they have them letter-perfect, practicing their choreography daily, doing vocal exercises, stretching, and getting plenty of rest. The more prepared they are in advance, the easier it will be for students to step out onstage with confidence. Procrastinating, not doing the work outside of rehearsals, and being lazy will all add up to feeling stressed when the time for tech and dress rehearsals approaches. 2. Play the “what if” game.Fear of the unknown is an easy way for students to psych themselves out when they are stressing over what might happen. What if they forget their lines? What if they miss a cue? Play the “what if” game as a group to put fears into words, and come up with an action plan for what students should do if something does go wrong. Encourage your students to be problem solvers and team players, and have them come up with creative ideas on how they can help each other out, should something go wrong in the moment. 3. Practice breathing exercises.When people are nervous, they instinctively take quick and shallow breaths to get more oxygen to their brain. Taking time to focus on breathing slowly and deeply can help students relax. Try the breathing exercise found here, give meditation a shot, or explore yoga techniques such as pranayama. Even a slow warm-up routine with simple stretching exercises can be very calming, and help students ease their nervousness. 4. Create a “stress jar.”This is a simple solution that teachers can put together in minutes. Take a jar or small box, label it “stress jar” or “worry jar,” and place it in a private spot with some slips of paper and pencils nearby. If students are feeling nervous or anxious, they can write their concerns on a slip of paper and either crumple it up or fold it into a tiny square, and then put it in the stress jar. Just the act of writing out their worries and putting them in the jar can help them alleviate nervousness – the worries aren’t immediately dealt with, but the jar will keep the worries out of the students’ heads until after the show. An alternative is to have students boost each other’s morale by giving each other “warm fuzzies” – find the instructions for this exercise here. 5. Remind students that everyone is on their side.Nobody goes to a show thinking, “Oh boy, I hope these students are going to really screw up tonight!” Audiences want to see a great show and they want the performers, technicians, and crew members to succeed. Especially when it is students who are putting on a show, audience members know that they are learning and growing, and that mistakes sometimes happen. But what’s even more important for students to remember is that audience members are blown away by the courage displayed by all the students involved in creating a show. Those people coming to see the show certainly aren’t getting up onstage, running a lighting or sound board, creating costumes, and keeping the backstage running efficiently, and they will be proud and excited to see the students making their team effort work. Furthermore, students must remember that it is they who are in control. And they can control their preparation, their attitudes, their effort, and their focus. By giving each performance their full effort, they have already succeeded!
Creating Atmosphere Using Music
Classroom Exercise

Creating Atmosphere Using Music

When creating a theatrical piece, it’s important to engage as many of the five senses as possible, including sound. It’s easy when you’re working on a musical; the sounds of the show are written right into the libretto. However, when working on a play, this may be more challenging. Choosing just the right music can evoke immediate feelings of a certain era: think of the big band sounds of the 1920s and 1930s, the swinging sounds of the 1960s, or the synth-pop bubblegum sounds of the 1980s. Similarly, an eerie, dark pipe organ playing in a minor key can put an audience in mind of a haunted house, while medieval harps and flutes immediately bring to mind pastoral fairy tale imagery. For this exercise, students will create a playlist of songs/musical pieces that would be appropriate for a selected play (not a musical). Students may select their own play, or the teacher may assign a specific play to the entire class. The playlist must include:• One song for pre-show music (while audience is entering the theatre and taking their seats). • Songs for three important scene changes within the show. • Songs for three important/significant moments within the show (for example, a dance, a death, a moment when two characters meet for the first time, etc.). • One song for intermission music. • One song to use during bows. • One song for post-show music (while audience is exiting the theatre). • TOTAL: 10 songs The songs may include vocals or may be instrumental pieces. Students will either burn the songs to a CD or USB drive, or create a playlist on an approved app (such as Spotify, YouTube, or Apple Music). Students will also submit a written component, which will include the following:• A written list of the ten songs, including title of song, artist, and album. • For the scene changes, students will identify which scene change they selected a piece for, and why they selected that particular scene change. For example, they could choose a scene change where the setting of the play changes location, or one that foreshadows an event to come. • For the significant moments, students will identify which moment they selected a piece for, and why they selected that particular moment. • For all songs selected, students will indicate WHY they selected that particular piece. Examples may include evoking a certain time period, mood, or theme; significant lyrics in the song; creating a contrasting feel from the previous moment; and so on. • Students will also complete a final reflection, describing the overall mood/feeling that they are going for with their song choices. Distance Learning Adaptation This exercise can be completed individually by students as written, as an independent study project. Students will select songs to create their own 10-track playlist for an assigned play. They should create the playlist on an approved app, such as Spotify, Apple Music, or YouTube. Students will also complete the written component, and submit it electronically along with the link to their playlist. Alternatively, you can do this assignment as a full class project. 1. For the play your class is currently studying, act as director and decide the time period / atmosphere / mood of the piece that you would like for the play. 2. Each student will select one song or instrumental piece of music that they feel evokes the atmosphere you have chosen. Students should consider different aspects such as the tone, musical style, and mood of the song, lyrical content, and the time period of the song (either when it was actually written or the style it sounds like). 3. Along with the title and artist or composer of the song (as applicable), students will find and submit a link to the song (such as on Spotify, Apple Music, or YouTube). 4. As well, students will submit a written paragraph describing why they feel this song is appropriate for the atmosphere of the play. Students can reference a certain character, scene, line, moment, etc. 5. Create a playlist with all the songs selected by the students. Send students the link to the playlist for them to listen to. Do not include a list of what song each student submitted – keep it anonymous. 6. Students will listen to the playlist and submit a written response to the following questions: • In your opinion, which three songs were the most appropriate for the mood/atmosphere of the play? Why? • In your opinion, which three songs did not match the atmosphere of the play? Why not? • What was your favourite song on the playlist, other than the one you selected? Why did you like it? • What a was a song that you had never heard of before, that you discovered on the playlist? What was your reaction to it?
Student Goal Setting Exercise: The Wish Jar
Classroom Exercise

Student Goal Setting Exercise: The Wish Jar

The following exercise has lots of variations and ways to adapt it for your classroom. No matter what variation you use, however, the ultimate goal (see what I did there?) of the exercise is to get students to set goals in the drama classroom. Why set goals? It gives students a sense of purpose and commitment, more so than just showing up and doing the class because they have to. Setting goals encourages students to take initiative in their own learning, and helps them to push themselves out of their comfort zones. The first step for this exercise is for students to think of a goal they’d like to work towards in the drama classroom. Goals need to be specific – “becoming a better actor” is too big and too vague. How are students going to become better actors? Think of baby steps that will lead to that big goal. Students should brainstorm for their idea individually. Some examples of goals might be: • To learn ways to memorize lines faster • To learn more about a type of technical theatre (lighting, sound, etc.) • To improve their auditioning technique • To learn more about a specific type of theatrical performance (puppetry, mime, etc.) Once each student has a goal in mind, they will write that goal on a strip of paper (without putting their name on it). Keep the goals anonymous. After the students have written out their goals, collect the paper strips and put them into a jar (the “Wish Jar”). What now? Here are three options for how to use your Wish Jar: “A Place of Prominence”After all the students have placed their goals into the Wish Jar, put the jar in a prominent place in the drama classroom. It will be a visual reminder of the goals they are working towards. After the students put their slips in the jar, have them complete a brief reflection that lists their goal and three ways they will work in the classroom towards achieving that goal. Collect the reflections and seal them up in an envelope, with the date of the last day of class on the outside. On the last day of class, open up the Wish Jar, and have each student read aloud one of the goals to the class. After the goals have been read, give each student back their reflection that they completed back at the beginning of the semester. Do they remember what they said? Have the students complete a second reflection, looking back on their goal from the first day of class, and compare it to how they’ve done throughout the semester. “Guardians of the Goals”Once all the student have put their goals into the Wish Jar, shake up the jar. Each student will then take someone else’s wish out of the jar. They are now the Guardian of that Goal. They must keep that slip of paper in their drama notebook or pencil case, and they are responsible for that goal for the rest of the semester. Have a group discussion about how they can help others achieve their goals. Why is it important to help others do this? Have students write a reflection that day about their Guardian Goal and how they will help that fellow student achieve their goals. “Goal of the Week”At the beginning of each week, draw a goal out of the Wish Jar and read it out to the class. Use that goal as a basis for a warmup, a reflection, or a team-building exercise. For example, if the goal is “To learn ways to memorize lines faster,” students might: • Share ways they use to learn lines quickly in a discussion • Work in pairs to develop a new technique for memorization • Complete a group exercise to see who can memorize and perform a short monologue or scene the fastest and most accurately Whatever variation you use in your classroom, empower your students to take ownership of their goals and wishes. Challenge them to aim really high and go for those goals! Encourage classmates to help each other out and work together to check those goals off their lists.
A Character Is Not a Whole Person
Classroom Exercise

A Character Is Not a Whole Person

One thing that often comes up in student writing is that characters only seem to exist from the first page to the last page. Students don’t think of their characters as having lives outside the world of the play, or before/after the action of the play. This can result in flat, surfacey characters who only act to move the story forward, rather than being dropped into a situation and reacting as a human being. If we want students to write three-dimensional characters, then they have to do some character development work that might not make it into the actual play. The more they know about a character, the more they can determine how that character is going to react in a situation. Read this quote to students and discuss its meaning. “A character is never a whole person, but just those parts of him that fit the story or the piece of writing. So, the act of selection is the writer’s first step in delineating character. From what does he select? From a whole mass of what Bernard DeVoto used to call, somewhat clinically, “placental material.” He must know an enormous amount more about each of his characters than he will ever use directly—childhood, family background, religion, schooling, health, wealth, sexuality, reading, tastes, hobbies—an endless questionnaire for the writer to fill out. For example, the writer knows that people speak, and therefore his characters will describe themselves indirectly when they talk. Clothing is a means of characterization. In short, each character has a style of his own in everything he does. These need not all be listed, but the writer should have a sure grasp of them. If he has, his characters will, within the book, read like people.” WILLIAM SLOANE Discussion Questions1. What does the phrase “A Character Is Not a Whole Person” mean? 2. Do you keep parts of yourself separate? Is there a way you act at school that you don’t act at home? 3. How is it useful to create details that don’t occur in the play? 4. How can learning about the whole person help you as a playwright? Exercise1. Character Unknowns: • Choose a character in a play that you have studied or are familiar with. • Give that character a character detail that doesn’t currently exist in the play. (Eg: In Hamlet, write down Hamlet’s favourite band, his favourite food, a food that he hates but his mom used to make him eat, his biggest pet peeve, the fact that he’s afraid of snakes, etc.) • Write a monologue for this character that identifies this unknown character detail. You still have to keep the character in the world of the play (Hamlet hates his stepdad, is friends with Horatio, etc.) but ask what can you learn about the character by writing about these new details. • Read the monologues out in small groups. What details did other students come up with? 2. Complete the same exercise with the play you’re writing. Create a character detail that is currently unknown in the world of the play. Write a monologue for your character that focuses on that detail.
Same Character, Different Choice
Classroom Exercise

Same Character, Different Choice

Are your students feeling stuck or frustrated with their playwriting assignments? This exercise will help get them unstuck by challenging them to explore alternative situations for their scenes and characters. You can do this exercise in three different ways: • Students changing a scene written by themselves, OR • Students pairing up, trading scenes, and changing a scene written by their partner, OR • By adapting a scene from an existing script. First, students will take their scene (either previously self-written, written by a partner, or a scene from an existing play) and read it through carefully. Then, they will answer the following questions on a separate sheet of paper, brainstorming 3-5 suggestions for each question. Suggestions could be comedic, dramatic, tragic, or ridiculous – the point is for students to generate lots of ideas and alternatives. 1. What might happen if one of the characters didn’t appear in the scene, or a different character appeared instead? (For example, in Hamlet, what if Ophelia or Rosencrantz was hidden behind the tapestry instead of Polonius?) 2. What might happen if one of the characters reacted in a completely different way than they did in the scene before? (For example, in Macbeth, what if Macbeth and Macduff start breakdancing instead of swordfighting?) 3. What might happen if one of the characters makes a completely different decision than they did in the scene before? (For example, in A Midsummer Night’s Dream, what if Oberon decides to kill Puck as a punishment when Puck places the potion on Lysander instead of Demetrius?) From this brainstorm session, have students choose one of their suggestions and use it to rewrite their existing scene into something new. The only rule is that the scene cannot just cut off and end abruptly with the change (as in, “He dies. The end.”). How does the change affect the rest of the scene, the characters, and the overall story? What happens now that the change has occurred? How do the characters react to the changes? Have students explore these thoughts during their rewrite. Optional: Once the scenes are rewritten, have students do staged readings of the new material. If students are working with scenes that they have written themselves, this exercise will be especially useful as they develop their scripts. It’s so easy to get stuck with clichéd scenarios and stock characters – this exercise helps students to push their limits and realize that anything is possible in the world of playwriting!
Scenes From A Bag
Acting

Scenes From A Bag

Scenes from a Bag is one of my most favourite theatre games. It can easily become one of those “takes over the whole class period” games because it’s simple and fun for students. This game is useful for practicing improvisation skills, working with different people, thinking on your feet, and exploring lots of different characters and scenarios in a short amount of time. Scenes from a Bag is exactly what it sounds like – an improvisation game lovingly adapted from the improv television show Whose Line Is It Anyway. (The original game from Whose Line was called “Scenes from a Hat” but I changed it to “bag” because the first time I played this game in a classroom, we had only a brown paper lunch bag to draw slips from. Whatever works!) Students divide up into pairs. For each pair, draw a slip of paper with a two-person scenario from a bag and have that pair improvise the scene. Each scene needs to have a beginning, middle, and end, and should be timed (between 1-2 minutes) to ensure all pairs get a chance to perform, and to keep the scenes from going on too long. The key to ensuring that the scene works is to remember the most basic improv rule: “Yes, and…” Whatever is established in the scene is the reality for that scene, and students must go along with it. For example, if one partner says, “Oh my goodness Kate! I can’t believe we’re on an African safari!” the other partner cannot turn around and say, “What are you talking about? My name is Ben and we’re working in an office right now.” That totally kills the scene. Go with whatever is brought to the scene! Scenes from a Bag can be played as simply as each pair drawing a slip and then performing in turn, but there are lots of variations you can employ in your classroom. If you come up with a great variation, please share it with us! Here are just a few variations to get you started: Partner Variations: * Students choose their own partners. * Two students’ names are drawn from a second bag to become partners. * Students divide into two teams. Each team selects a member of the opposing team to perform in the scene. Scenario Variations: * Students choose scenarios prepared in advance by the teacher. * Students brainstorm a list of scenarios and submit them to the teacher, who selects the best ones to put in the bag. * Students choose their own scenarios out of the bag. * Someone else (the teacher or another student) chooses the scenario for the pair. Gameplay Variations: * Partway through the scene, the teacher calls out “switch” and the pair switches roles. For example, if Partner A was playing a dentist and Partner B was a patient, after “switch” is called, Partner B becomes the dentist and Partner A becomes the patient. They then continue the scene. * One pair starts the scene. Partway through, the teacher calls out “freeze” and another pair “tags in” and finishes the scene. * One pair starts the scene. Partway through, the teacher calls out “ailment!” and gives one of the partners an ailment to add to their character. For example, the students may be acting out a scene where they are paddling a canoe down a creek. Suddenly one of the partners has a broken arm / comes down with a case of the chicken pox / realizes they are being chased by a shark / etc. (The possibilities are endless!)