Facebook Pixel Skip to main content

📣SCRIPT SALE! Treat yourself to an easier Fall. Save 30% on 5+ perusal scripts with code SPRING30 before May 3 and head into summer stress-free.

Middle School Miming: Interacting With a Door

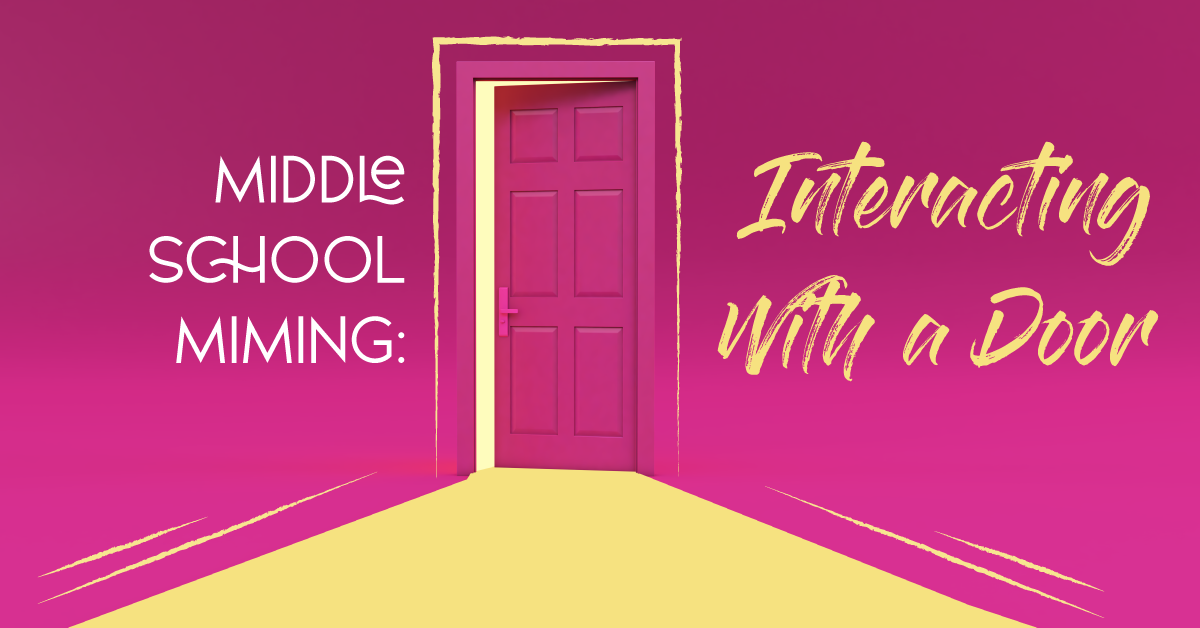
By this point, students will have learned about and practiced miming preparatory skills (including stillness, focus, and visualization), portraying items of different weights, and interacting with a wall. All these exercises will help students to work up to this miming sequence of interacting with a door, which is more complicated than students will likely anticipate. We’ve broken down the sequence into three main steps, so students can practice and build their miming skills. Remember: the goal of miming is to “make the unreal, real.” By moving slowly and deliberately and using their visualization skills, students can achieve this goal. Let’s jump right in.


Step 1: Students will first plan out and then practice reaching towards the invisible “door” and grasping the doorknob. Have students stand in neutral positions — feet flat on the floor, hands by their sides, shoulders and arms relaxed. With their right hand, students will reach across their body on a diagonal line in front of the left side of their body, extending their arm at around waist height. Look at the air where you imagine the doorknob would be, and see in your mind’s eye a spherical (round) doorknob. Reach forward and grasp the spherical doorknob on the invisible door in front of you. Remember that you have to give the doorknob “shape” by splaying your fingers wide, reaching forward, then placing your fingers around the shape of the doorknob without “crushing” it. Hold your fingers out so they are curved around the invisible doorknob. Hold this position for a couple of beats. Then, release the doorknob and replace your hand by your side. Practice this motion three to five times, and then repeat on the other side, with the left hand reaching in front of the right side of the body.

Step 2: Next, students will practice opening the door. Again, starting from neutral, have students go through the process of reaching for the doorknob with the right hand and grasping it. Then, students will slowly “turn” the knob in the direction of their choice, and then slowly PUSH the door away from them, keeping their arm steady and level while they are moving it. This is because the doorknob needs to stay level; it can’t shift up and down the door. Once the height of the doorknob is established, it has to stay at that height throughout the sequence.

Be aware that the door would have hinges on the right side (opposite side to the doorknob, near the student’s right elbow), so their hand would move away from themselves on a slight curve towards the right, following the direction of the door. Hold the “door” open for a few beats, then slowly “close” it again. Practice this motion three to five times, then repeat on the other side. Students would grasp the doorknob with their left hand, push open the door away from their bodies and towards the left, and then close it again.

Step 3: Third, students will practice opening the door, walking through it, and closing the door behind them. Starting from neutral and with the right hand, students will reach for the doorknob, grasp it, turn the knob, and push the door open, keeping all movements slow and precise. Once students have “opened” the door, they will slowly walk through the door, turning slightly clockwise towards their right hand. They will switch hands and grasp the invisible doorknob on the “other side” of the door with their left hand. They will release the doorknob with their right hand, then slowly push and close the door away from themselves. Remember to keep the doorknob height consistent, and make sure the door is closing in the correct direction. Once the “door” has been closed, students will release the doorknob and let their hand and arm rest next to their side. Stay on that side and repeat the sequence, remembering that they are now on the other side of the invisible door and they’ll need to repeat the motions with the left hand and on the opposite side. Repeat this full process three to five times.

Extension: There are many different kinds of doorknobs/door handles, so students have some options to explore once they are comfortable miming a spherical doorknob. For example, have students try this sequence again with a thin vertical door handle (completely mounted to the door) or a horizontal door handle (one that you can jiggle the handle up and down on). As well, students can explore pulling the door towards them. They’ll just need to remember to step out of the way of the invisible door coming towards them.

At the end of class, have students fill out an exit slip (found in the giveaway below).


Click here for a free exit slip.
Download For Free

Related Articles

Middle School Miming: Interacting With a Wall
Teaching Drama

Middle School Miming: Interacting With a Wall

We’ve all seen the classic “mime stuck behind an invisible wall” routine, and when you mention miming to students, typically they’ll immediately start waving their hands around in that fashion. This sequence takes a lot of focus and physical stamina, even though the movements are small. The more deliberate and mindful the movements are and the more concentrated the students are on their eye focus, the more “real” the sequence will appear to the audience. Let’s get started. 1. Practice.Have your students start by practicing interacting with an actual wall. Have them stand facing a wall in the drama classroom, about 12–15 inches away, depending on how long their arms are. They’ll need to be able to place their palms flat against the wall while keeping a bend in their elbows; they shouldn’t be stretching to reach it. Have students stand with their hands by their sides. Look at the spot on the wall where you will place your right hand. Take your right hand, slowly raise it to around face height, softly spread the fingers apart, and place the palm against the wall firmly and with intent. Now, look at a different spot on the wall where you will place your left hand. Keeping the right hand on the wall, raise the left hand to face height, spread the fingers apart, and place that palm firmly against the wall. Feel the wall against both hands; the wall is strong and unyielding, and even if you press hard against it, it doesn’t move. Keeping the left hand on the wall, look at a new space on the wall, remove the right hand, and place it firmly on another place on the wall. Keeping the right hand on the wall, remove the left hand and place it somewhere else on the wall. Repeat the motions of removing one hand from the wall and placing it on another part of the wall, while always keeping one hand against the wall and looking towards the new spot on the wall where you will move your hand. Look, remove, place, repeat. Keep movements slow and purposeful — removing and placing, rather than sliding. To end the routine, take one hand off the wall and let it rest naturally against your side. Then, take the other hand off the wall and let it rest against your other side. 2. Visualize.Have students come away from the walls and find a place around the drama classroom, facing you. Students will stand in neutral positions, with feet flat on the floor and arms resting at their sides. Have students close their eyes or gaze softly forward. Using their visualization skills, students will picture in their mind’s eye the wall they were just interacting with. Imagine the wall — what colour is it? What material is it made of? How thick do you think it is? How far away from the wall are you? (It should be the same distance as when you were interacting with the actual wall.) Keep that image clearly in your mind as you move to the next step. 3. Make the unreal, real.If students have their eyes closed, have them open them now. Look straight ahead and “see” in your mind’s eye the wall in front of you. Start the same motions as when you practiced touching the actual wall: look towards where you will place your right hand (around face height), slowly raise your right hand, softly spread the fingers apart, and firmly place the palm in the air “against” the invisible wall. This first step is important, as it establishes the parameters of where the wall is in relation to the student. The wall can’t move around or it will become unreal to the audience. Keeping the right hand in place “on the wall,” look to where you’ll place your left hand, raise the left hand, spread the fingers apart, and place that palm firmly in the air “against” the invisible wall. Make sure that the left hand is placed at the same distance away from the body as the right hand, or the “wall” will be crooked. Students might notice that their fingers or palms feel tingly or warm — they’re getting the blood flowing from moving their hands so purposefully! Repeat the motions of looking at the new place on the wall, removing one hand from the wall and replacing it on another part of the wall, while always keeping one hand against the wall. Look, remove, place, repeat. As always, keep the movements slow and purposeful. Keep the distance between your body and the “wall” consistent at all times. To end the routine, take one hand off the wall and let it rest naturally against your side, followed by the other hand. If necessary, have students shake out their arms and hands afterwards to release any built-up energy or tension. 4. Perform.Split students into small groups and have them perform this sequence in front of the rest of the class, to demonstrate what they’ve been practicing. Give students a specific number of hand movements to perform, or have them keep moving until you ring a bell or make a gesture to indicate to them to end the routine.
Middle School Miming: Big, Small, Heavy, Light
Classroom Exercise

Middle School Miming: Big, Small, Heavy, Light

Students new to mime will often just start moving their hands haphazardly, like an item magically appeared in their hand out of thin air. But one of the ways a mimed object is made “real” is by portraying the process that a person goes through to physically interact with an object. We don’t think about it because actions like picking up and passing objects to a classmate are things we do every day. But if you break it down, it’s actually a full series of movements: reaching for the object, grasping it with our hand(s) and gripping it without squishing or dropping it, lifting it and accommodating its weight and size, manipulating the object in some way, and then dispensing of the item somehow, such as by passing it to another person or setting it down. That’s a lot of steps! When miming, each series of movements needs a beginning, a middle, and an end — like a miniature story. This makes the invisible, mimed object more clear for the actor to portray and for the audience to understand. In this exercise, students will practice accurately miming objects of different sizes and weights: small, big, light, and heavy. Using the beginning/middle/end framework, each student’s beginning movement is taking the object from the student on their left. The middle movement is holding/interacting with the object. The end movement is giving the object to the student on their right. Let’s get practicing. Instructions1. Have students stand in a large circle. 2. The teacher will introduce the four invisible “objects” that students will be passing around the circle, one for each category listed. (“Objects” is in quotation marks because the items will be mimed and therefore aren’t real.) For example: • Small: an eraser, a ping-pong ball, a thimble • Big: an inflatable pool float, a giant novelty teddy bear, a large cardboard moving box • Light: a feather, a balloon, a silk scarf • Heavy: a bowling ball, an encyclopedia, a brick 3. The teacher will start the exercise by slowly “picking up” the small “object” off the floor (a beginning movement) and describing the “object” verbally. While the item is being described, students will use the visualization technique they learned and practiced to imagine the object in their mind’s eye. Remind students that the item is not a magical item and doesn’t change (grow, shrink, etc.) as it’s passed from person to person — each student needs to maintain the structural integrity of the mimed object. 4. The teacher will slowly pass the invisible small object to the student on their right, who will take it from them. The student will briefly interact with the item in some way (holding it in their palm, passing it from their left hand to their right, testing the weight of the item), and then pass it to the student on their right. Each student will repeat the process with the invisible small object: taking it from the student on their left, manipulating it somehow, and passing it to the student on their right. Remind students to move slowly and deliberately, so everyone can see clearly how the mimed object is being used. Audiences will look at what the actor is looking at, so encourage students to use their full bodies and faces — especially direction of eye focus — while miming. 5. Have students observe how they themselves and their peers interact with the small item. How do they pick it up? Does the student next to them place it in their hand or do they hold it in their palm for the next student to pick up? How firmly or loosely do they need to grip the item? Do they use one hand or two? 6. When the final student passes the object back to the teacher, the teacher will place the object back on the floor (the overall end movement). 7. Repeat the process with the big, light, and heavy “objects.” Students will need to adjust their lifting and passing movements to accommodate the differences in the objects. Compare and contrast the movements needed to accurately portray each of the objects. 8. If your students get really good at this exercise, try the exercise again with “objects” with two qualities: big and heavy, big and light, small and heavy, small and light. Remember to continue to use the beginning/middle/end framework. Note: If your students are having trouble visualizing or miming certain objects, it may be helpful for them to start by interacting with four real objects representing each of the four qualities. For the big and heavy items, be sure to select objects with some size/heft, but that aren’t so unwieldy that they’ll seriously hurt someone if they’re dropped. Be aware of the strength level of your students — some students might not be able to lift very much weight, and you don’t want students to hurt themselves. Once they are clear on the physical qualities of the objects, they may be able to more accurately portray them.
Middle School Miming: Preparatory Skills
Teaching Drama

Middle School Miming: Preparatory Skills

Miming is a great topic for middle school drama students. The art of miming uses the actors’ bodies and imaginations to tell a story, without using their voices. It’s all about “making the unreal, real” through thoughtful and purposeful movements. But before we jump into mime work, students need to learn and practice three preparatory skills: embracing stillness, developing their focus, and visualization. These skills will help students prepare their bodies and brains to explore different miming exercises. 1. StillnessIt can be challenging for students to practice stillness, as they are generally hardwired to move, wiggle, and fidget. But it’s a skill that can be practiced, and can be used in so many situations. All miming exercises should start with stillness. This allows students time to breathe, ground, and centre themselves before starting into purposeful mimed movements. To work on stillness, start by reviewing and practicing “neutral position”. As a reminder, it’s a body position where the actor is standing with their feet flat on the floor, about shoulder-width apart, knees relaxed (not locked), back straight, arms and hands by their sides, looking forward without any facial expressions, and silent. You may also have students use a seated neutral position. A seated neutral position is where the actor sits in a chair or stool with their feet flat on the floor, back straight, hands placed gently on thighs, looking forward without any facial expressions, and silent. Blinking and breathing is always allowed! Have students practice standing or sitting in neutral for short periods of time. Start really small, like 10 seconds of stillness and silence. In between practice sessions, encourage students to move and shake their wiggles out. Then gradually build up to longer increments of time. You can also try having students start in neutral for a count of 5, move slowly over the count of 5 into a specific pose, hold the pose for 5, and then move slowly back into neutral over a count of 5 again. Repeat as many times as you wish. 2. FocusThe classic mirror exercise is a great way for students to practice focus. It’s a drama class standard for a reason! Students partner up and face each other. One student acts as the leader, moving their arms, hands, head, and face in slow and steady patterns so that they can be “mirrored” by their partner. The emphasis on slow and steady is key for students to focus on precision and exact movements — looking at details all the way down to the fingertips, and making each movement purposeful. The goal for the follower is to copy the leader exactly — if someone were to watch the pair, they wouldn’t know who was leading. Start this exercise with having students stand with their feet planted, so it’s one less movement they have to think about. It’s also a good way for students to practice stillness in their lower bodies. Once students are demonstrating good focus and precision with just their upper bodies, you can add in lower body movements (legs, feet, hips). Once students feel more confident with the pair mirror exercise, add a layer of challenge by having them make groups of four and complete the exercise in a diamond shape. 3. VisualizationIn mime work, any “props” are invisible — just air. To convince an audience that the mime is actually interacting with a real item (a flower, a rope, a gift box, a door, and so on), students need to make their movements precise and purposeful. To help them do this, they need to visualize the item. Visualization is to imagine or “see” something in your brain, or mind’s eye. If students have a clear picture in their heads of what the item they’re portraying looks and feels like, that really helps them to bring it to life through their movements. Students can practice visualizing by having the teacher lead them through a guided visualization experience. As a bonus, it’s a great way to practice stillness and focus at the same time! Have students sit comfortably in the room, where they can hear you easily. If they feel safe to do so, they can close their eyes; otherwise, have them choose a focus spot in the room to softly gaze at. Choose a familiar object, for example, an ice cream cone. Then, have your students listen intently as you describe the item in detail, using all five senses to create an image in their mind’s eye. For the ice cream example, you could describe the size and shape of the ice cream cone, the choices of toppings, the feeling of the melting ice cream touching your hand as you grip the cone, the coldness on your tongue as you take that delicious first bite. Leave some details open to the students’ choices. For example, you might suggest that the ice cream is your students’ favourite flavour. Then, with students still seated and with the images still clear in their minds, they can start to explore some small movements associated with the item, such as holding the imaginary cone in their hand, taking a bite and savouring the taste, or wiping a drip of melted ice cream off their hand. All those sensory details, combined with students filling in their own personal details, will help them to create a super-clear picture in their mind. When students are in the midst of visualizing an object for actual miming activities, they won’t take this much time or go into this level of detail in those moments, but this is a way to introduce them to visualizing and help them develop those visualization skills. When they’re able to clearly visualize an object, it will be that much easier for them to portray the item through their movements for an audience. We’ll be exploring this in upcoming articles, so stay tuned!