📣SCRIPT SALE! Treat yourself to an easier Fall. Save 30% on 5+ perusal scripts with code SPRING30 before May 3 and head into summer stress-free.
Auditions
Directing
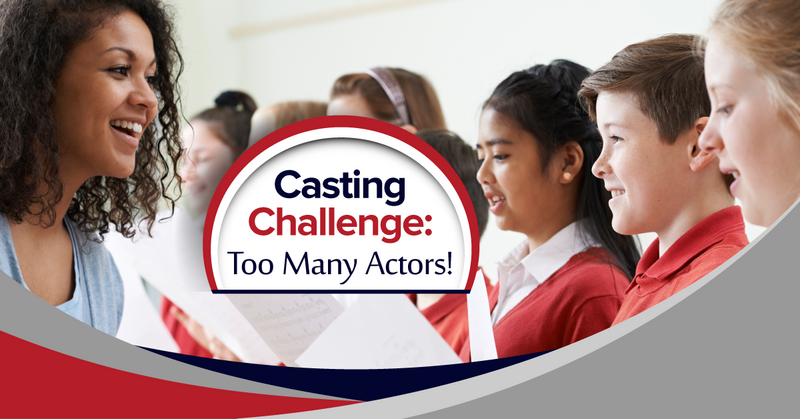
Tips for Casting a Musical Revue
Musical revues are a great choice for a school production. There is no limit on how many students you can cast, you can tailor the casting of the show to fit the skills and talents of the students involved, and unless you choose a revue with strict casting requirements (for example, Shout! The Mod Musical is specifically written for an all-female cast), you aren’t bound by gender identity, race, sexual orientation, or age when casting the show. Let’s take a look at some tips for casting your musical revue.
As a reminder, a musical revue is a style of musical theatre that combines singing, dancing, music, and sketches. The material included in a musical revue focuses on a particular theme. Some musical revues feature a single musical artist (such as A Grand Night for Singing, which features the music of Rodgers and Hammerstein, or Putting It Together, featuring the music of Stephen Sondheim) while others include pieces by many different artists. Some musical revues have a loose storyline but the overall theme is the main focus. Some examples of musical revues include Edges, Songs for a New World, The Theory of Relativity, Working, Side by Side by Sondheim, Red Hot and Cole, The No Frills Revue, Ain’t Misbehavin’, Beehive: The 60’s Musical, Monty Python’s Edukational Show, Forbidden Broadway, MTI’s Broadway Junior Revue: Pure Imagination and MTI’s Broadway Junior Revue: Raise Your Voice, A Pocketful of Rhymes, Jerry’s Girls, and Smokey Joe’s Café.
Some musical revues require a specific number of performers while others are more flexible and allow for creativity when including more performers, adding an ensemble, and assigning songs to different performers. Always be sure to check with the licencing company to ensure that your ideas for your musical revue do not conflict with the requirements of the show as set out by the rights holders.
If you are producing a musical revue that allows flexibility for casting, you could include every student who auditions, even students who aren’t the strongest singers. Many musical revues feature scenes or monologues between songs, and you can feature your stronger actors in those sections. Similarly, your students who love movement and dance can be featured as dancers in certain numbers. Shy or inexperienced drama students might only want to be in a couple of numbers or just in full-cast numbers, and that’s fine too — musical revues are a great way for them to dip their toe into the performing pool.
During the audition process, create a spreadsheet with each student’s name in the first column, as well as a column each for “acting,” “singing,” and “dancing.” You can use this spreadsheet for a variety of purposes. You could rate their skill level in each area as displayed in the audition (3 for a highly skilled student, 1 for a less skilled student), have students give themselves a rating, or use it to indicate whether the student prefers acting, singing, or dancing. In the latter option, 1 indicates first choice, 2 indicates second choice, and 3 represents third choice. For example:
Directing
Pros and Cons: Open Auditions vs. Closed Auditions
There are various methods of having students audition for your upcoming theatrical production. The most common methods are having students present a prepared monologue and/or song or doing cold readings from the script. You also need to consider whether you’ll run open auditions or closed auditions. Open auditions versus closed auditions basically deal with the location of the waiting students. An open audition is where you gather all the students into one room and have each one present their audition in turn, in front of the artistic team and the rest of the students. A closed audition is where each student auditions by themselves in front of the audition panel, while the rest of them wait elsewhere.
The method of auditioning you choose will depend on you, your students, and your available resources. Let’s look at some pros and cons to both methods.
Open AuditionsOpen auditions are exactly that: open and transparent. They give students the chance to perform in front of an audience and allow them to demonstrate how they work under pressure. The major pro for open auditions is that everyone is present and can see how everyone else did. Therefore, each student’s choice of audition piece, presentation, and apparent confidence and preparedness are evident. This can sometimes be a slight disadvantage if you decide to cast a different student in a leading role than the one the students perceive as the “best” performer, but ultimately that choice is up to you as the director.
With open auditions, you may choose to have the waiting students sit facing the auditioning student in a typical audience style; or you can have the waiting students sit behind the auditioning student and have the artistic team on the other side, so the auditioning student doesn’t have to see all the other students staring at them. As always, you know your students best, so set up your audition area in the way that best suits your students’ needs.
An advantage of open auditions is that since you have all the interested students present, you can do group work right away, such as group readings from the script, group improvisations, chemistry reads (to see which students work well together), dance auditions, or learning a song from the show.
Another pro of open auditions is that you’ll only need one room to hold auditions in; but a con is that it’ll need to be a big room to accommodate all the students, and you’ll need adequate seating for everyone present, unless you plan on just having them sit on the floor while they wait.
The main con reported by my previous students of open auditions is that they can be extremely nerve-wracking. Students are often terrified of what their peers will think of their audition piece, their performance, and whether they screwed up. They worry that the director will make them perform their audition piece again or take a note that is embarrassing. Despite the fact that students will inevitably be performing in front of an audience, they often feel that their fellow students will judge them or make fun of them ahead of time.
Another con is that unless you have a planned order of auditioning, students may be reluctant to volunteer to go first, even if it means they’ll be done quicker. As well, if you are keeping all the students for the entirety of auditions (which is the most fair), students may have to sit around and wait for a long time for their turn. They might get antsy or start to become chatty or disruptive as time passes. You’ll have to remind students that their behaviour throughout the entirety of the audition (which includes the time spent in the audience) counts towards their casting. Depending on the length of the audition session, you may have to schedule bathroom and/or snack breaks for the group.
Closed AuditionsClosed auditions are simple and intimate. It’s just the student and the artistic staff, so each student receives one-on-one attention. A major pro of closed auditions is that students are generally way less nervous auditioning for just the artistic staff, without the added pressure of auditioning in front of their friends and classmates. If your students are particularly nervous or anxious about presenting their auditions, this method might be your best bet.
In closed auditions, you can make and post/send out a running order schedule for students, and it saves them a lot of time because they only have to attend for the length of time they’re assigned to complete the audition (generally between 5–15 minutes, depending on the time available and the number of students who are auditioning).
Another pro is that it’s much easier to give students comments and feedback right away, and even have students try again and apply the notes (as time permits). Or, you might have them do an additional cold reading from the script. With closed auditions, you don’t necessarily have to have every student do a cold read or present their audition again in a different style; you can tailor each student’s audition to best suit them and their abilities.
With closed auditions, students only know how they themselves did. They can, of course, talk with each other about how they think they did, but they won’t know exactly what happened in everyone else’s audition. That can be advantageous, as you can cast the show any way you please and the only ones who know exactly what went on “in the room where it happens” is the artistic team.
One disadvantage of closed auditions is that you’ll have to schedule an additional day of auditions if you wish to have students do any group work or chemistry reads. You run the risk of a student not being available for the additional day and worrying that this might jeopardize their chances of being cast or getting a good role.
You’ll also need more resources for closed auditions. You’ll need a second location for students to sit in while they’re waiting, with adequate seating for all the students. You’ll also need at least two additional staff members: an audition assistant to supervise students who are in the waiting area, and if you are the solo member of the artistic team, you may wish to have an additional staff member present so you are not alone in a room with a student behind a closed door.
You may wish to poll your students to find out which audition method they prefer and why. Click the giveaway below to download a resource with discussion and reflection questions for you and your students.
Additional Resources:
How Do You Cast School Plays?
Round-Up: Best Casting Advice for Fellow Directors
Pros & Cons of Double Casting
How to Practice Cold Reading
Directing
How to Effectively Create and Use the Audition Waiting Area
You’ve chosen your show, purchased the rights, and let your students know about auditions. There’s a lot to prepare, but we are here to help you out!
In this article, we’re focusing on a small detail that can make a big difference in your students’ audition process: the audition waiting area. It can be nerve-wracking for students to wait for their turn to audition, so making the audition waiting area as welcoming, comfortable, and useful as possible goes a long way to helping students have a positive experience.
1. Choose the environment.You may have limited options for where your audition waiting area can be. It may have to be the hallway outside of your drama classroom. However, if possible, arrange to use a nearby but separate classroom as the waiting area. Pick a space that’s not so far away that it’ll take ages between candidates to get to the space, but far enough that students don’t have to listen to other students’ auditions.
Have adequate seating available for everyone waiting to audition. Ask students to wait quietly and avoid loud or excessive chatting. If students need to do a vocal or physical warm-up, encourage them to do so quietly and unobtrusively, such as by humming and stretching rather than belting and doing jumping jacks.
Be sure to note where the nearest bathroom and drinking fountain are, and have a safe and discreet area available for students to leave their personal belongings if they bring any. If necessary, post signs indicating where everything is.
2. Prepare the space.Now that you’ve got your location scouted, you’ll want to create a welcoming and useful environment for the waiting area.
Have copies of the rehearsal and performance schedules available for students to take home, as well as participation contracts with attendance rules, rehearsal and performance behaviour etiquette expectations, and any additional information that students and their families need to be aware of. This way, students can take the information home and (hopefully) give it to their family members, so they know what’s going on, what is involved with participating in a show, and that there are no surprises later.
You may wish to have some copies of the script available, and books or articles about the show for students to quietly peruse while they’re waiting.
In addition to having adequate seating, you may also want to have some fidgets or stress balls available for students to use while they’re waiting, to keep their nerves in check. You might also want to have a mirror available for students to check their appearance. (For bonus points, stick some Post-it Notes with positive affirmations around the edge of the mirror frame!)
3. Get a friendly assistant to help out.A kind and welcoming assistant is the most important part of the equation. The assistant could be a faculty member or a student volunteer. Avoid having someone from the artistic team be the one to sit in the waiting area, as they’ll miss all the auditions.
The assistant is responsible for greeting and welcoming everyone, ensuring students fill out any necessary paperwork ahead of the audition, escorting students to and from the audition space, and keeping the waiting area atmosphere calm and quiet. You may wish to have the assistant take photos of the students so you remember who is who, especially if you’re working with a bunch of new students. Have your students hold up a piece of paper with their name at the bottom of the photo, and if you do printouts, have your assistant attach each photo to the appropriate paperwork — again, so you remember who was who.
The assistant can also be a spy of sorts! Have them make subtle notes about things like:
• Who arrived when? Did students arrive early, on time, or late? Did anyone arrive together? This could indicate how students might arrive for rehearsals.
• What did the students do prior to auditioning? Did they chat, were they nice or were they catty? Did they review their material or did they disturb others? Were any cliques forming?
• Who seemed nervous? Reassure them. Who was nice? Take note of these students. I always like working with nice people!
• If the friendly assistant is comfortable doing so, have them quietly and casually chat with audition candidates. What are they like? Why are they auditioning? Are they new or experienced? This information can be really helpful when it comes to the casting process.
• Did the student do or say anything unusual after leaving the audition room?
The assistant can then report back to the rest of the artistic staff with their findings. Any information they can pass on to the team can help with the casting process. If a student is super talented but arrived three seconds before their audition time slot and was nasty to the other students, you should take that into consideration when casting them.
Don’t forget, at the end of auditions, to tidy the room you’re using and return everything you moved back to their original locations. Throw away any garbage and leave the space looking better than you found it.
What are your best tips for creating a welcoming audition waiting area? Let us know!
Additional Resources:
The Audition Toolkit
The Ultimate Audition Guide: Teacher Edition and Student Edition
Pros & Cons of Cold Readings
Round-Up: Best Casting Advice for Fellow Directors
Teaching Drama
The Audition Toolkit
Auditions require more than talent. Even the most talented students need confidence, communication, active listening, flexibility, a strong work ethic, and proper preparation. The Audition Toolkit can help!
This easy-to-use e-book contains 22 articles, exercises and audition templates to help teachers incorporate audition skill building into the program. Plus printable articles, tips, and technique sheets for students to use for their own audition preparation.
Acting
“Let’s Try That Again”: Taking Direction in an Audition
It’s rare that a student will select the absolute perfect monologue to show exactly everything they’re capable of doing onstage. One monologue can only go so far in showing a student’s acting range. Perhaps the student chose a dramatic monologue and you wanted to consider them for a more comedic role. Furthermore, a student might blow you away in that particular moment that they’ve practiced and perfected, but does that mean that they can take direction? Are they open to exploring, playing, and trying a different approach to the character?
Well, there’s a way to find out… Give them some directions!It’s advantageous to allow time in auditions to have students try their monologues again, with some direction from you. The directions you give can run the gamut from practical feedback – such as slowing down, speaking more loudly, or separating their words – to a slight performance change, such as doing the monologue with or without an accent or standing up rather than sitting – to an entirely different approach to the character. This is most likely the biggest challenge for your students, but the most fun as well.
If a student presents a dramatic, serious monologue, have them try performing the monologue while pretending to hold back hysterical laughter, or as if they have an urgent need to use the restroom. If their monologue includes a lot of yelling or anger, have them perform as if they are trying not to wake a sleeping baby. Try changing up the location of the monologue – have your student perform their monologue while imagining they are in a hot desert, in a sinking rowboat, or on a roller coaster. Or, switch up who the person is that they are speaking to in the monologue. The tone of a monologue tone would be very different if the character is speaking to their crush, their grandmother, a celebrity, or the prime minister.
This technique is a great way to gauge how open the student is to taking direction, how fast they can think on their feet, how attached they are to their initial blocking, and how well they listen. Of course, you cannot expect a polished, perfect performance on the second go, but watch carefully and see what might be glimmering under the surface!
If you plan to use this technique in your next round of auditions, be sure to let your students know this in advance so they aren’t completely thrown off during the actual audition. As I always say, this skill (taking direction in the moment) is definitely something that students can practice and develop in the drama classroom!
The following mini-exercise is a great way to introduce the concept of taking direction on the fly:1. Have students prepare a brief monologue – only three to five lines. It’s best for students to act as if this was a real audition and memorize their lines, but this exercise also works if the students are still “on book.” Students will perform their brief monologue as if they were doing an audition – focusing on emotions, expression, and gestures – not just saying/reading the lines aloud. (Students should also know what play the monologue is from and what character they are performing.)
2. Take five minutes to brainstorm (as a full class) a list of simple directions that could be used to mix up the monologues. Here are a few to get you started:
• Riding a jet-ski
• Concerned they may have stepped in something smelly
• While chewing gum
• On a rollercoaster
• While knitting a sweater
• Talking to a very small child
• In the middle of the Arctic tundra
• Riding a horse
• After they discover they’ve won the lottery
• Trying to dislodge something stuck in their teeth
3. One at a time, students will present their brief monologue to the class, as they have prepared it.
4. Then, you will select one direction from the brainstormed list for them to use as a prompt, and the student will perform their brief monologue again, using that prompt in their performance.
5. How did the student feel after experiencing the new direction for their performance?
Feel free to repeat this exercise within the classroom, working up to fully memorized pieces and longer monologues.
Distance Learning AdaptationThis exercise can be done as written, using a video conferencing program such as Zoom or Skype. Students will prepare a short monologue, brainstorm a list of directions, present their monologues live on-camera, receive a direction, perform again, and compare how they felt after performing twice. If necessary, have students complete and submit their comparison as a written reflection.
Before presenting their monologues, have students discuss the advantages and disadvantages of auditioning on video versus auditioning in-person. Some things to think about may include video quality issues, how you frame yourself in the camera, and avoiding audio problems such as echoes and lag. As well, compare the differences between presenting their monologues live versus pre-recorded.
Acting
How to Practice Cold Reading
Cold reading (or sight reading) is where actors read aloud from a script, scene, or text with little to no advanced preparation. It’s frequently used in auditions either instead of or in addition to prepared monologues. Cold readings are great if your students are intimidated by the idea of choosing and memorizing a monologue, or would prefer to audition in a group setting. Cold readings can be challenging though, particularly for students who aren’t the strongest readers. It can also be challenging for students to connect with their scene partners if they’re already busy trying to keep up with just saying the lines correctly. More pros and cons of cold readings can be found here.
However, cold reading is a skill that can be practiced and developed in the drama classroom. Here’s a classroom exercise that you can use with your students to practice cold readings. It will take a minimum of three classes to complete, but could be extended if you wish.
Directions
1. Pre-Exercise PreparationFor this exercise, you will need, at minimum, enough different scenes for every two students in your class (as they will work in pairs). So, if you have 20 students, you will need 10 two-person scenes. This exercise works if you have your students all work on the same scenes, but it can get a little monotonous to watch over and over. This exercise can also be adapted for larger group scenes or monologue work, but for now we will focus on two-person scenes.
If you don’t already have a collection of scenes and monologues for your classroom, start gathering these! Whenever I read a play, I’m always on the lookout for scenes and monologues for my students to use in class. I have a binder full of monologues (read more about that here) and another one with lots of scenes. My scenes binder is organized with dividers for the number of characters in each scene – two-handers, three-handers, four-person scenes, and more than five characters. I also make a note on the top of the page of the character names for easy reference.
Theatrefolk also has a great page of free resources to get your scenes and monologues collection started. Check it out here.
2. Class #1Divide students into pairs. You may select the partners yourself, draw names from a hat, or let students select their partners. One pair at a time will come to the front of the class. You will give them one of your two-person scenes, which they will present in front of the class. (You may choose what role your students play within the scene or let them pick – it’s up to you.) After each pair performs, you may wish to give some feedback or have students provide peer feedback – just remember to keep the comments constructive and focused on practical performance notes rather than focusing on whether or not students liked or disliked the scene/characters/writing. Have the students take notes in a practice log of the feedback they receive.
After each pair performs, students will individually write some brief notes on their practice log about their thoughts on their own performance.
3. Classes #2 and #3For classes two and three, students will repeat the exercise each day with a new partner and new scene. (You may wish to keep a record of which student performed with which partner and what scene they performed so they aren’t repeating.) Again, after each performance have students record their thoughts and any peer feedback on their practice log.
After each student performs with three different partners, they will complete and submit their practice log and an individual Reflection.
Acting
Creating Your Audition Toolkit – Songs
In our last post, we talked about creating a monologue notebook to help students collect and reflect on various monologues that could be useful for any upcoming auditions. In this post, we’ll be discussing how students can start their own audition toolkit for musical theatre auditions. This is also a great resource for teachers to have in their classrooms as well!
1. For musical theatre auditions, students will need to start amassing a collection of sheet music. Most musical auditions will require students to sing with an accompanist on piano. Some musical auditions may be performed a cappella (without accompaniment) but it’s good to be prepared.
2. Students need to be sure that their sheet music is actually in the correct key! They can check by plucking out the notes on a piano, or getting a friend to play while they sing. So many students simply sing along to the Broadway cast recording and memorize the words by listening to the songs over and over, but then are shocked to realize that the actual sheet music is written in a different key than what they are used to. Nobody wants to be caught at an audition with a piece in the wrong key – it causes stress for both the person auditioning and for the accompanist who may or may not be willing to sight-read the piece and transpose it to the “correct” key.
3. Students will need to have two binders for musical theatre auditions: a repertoire binder and an audition binder. A repertoire binder holds all the sheet music from every song they’ve ever learned. But don’t bring this to an audition! It’s probably large and unwieldy and difficult for accompanists to turn pages in.
The audition binder should be a one-inch binder containing only the pieces that the student will be performing for that audition. The sheet music should be double-sided (for easy page turning) and clean – no rips or folds in the paper. Some people like to put their sheet music into plastic page protectors. If students go this route, they will want to be sure to invest in good-quality page protectors that do not stick or rip, and do not reflect glare from overhead lights.
4. Repertoire binders should be divided into three sections for the sake of organization: classic musical theatre, modern/contemporary musical theatre, and pop/rock. From there, students may wish to subdivide the sections into up-tempo pieces and ballads. Within the sections, pieces can be organized in alphabetical order or by date of when the piece was published.
5. Where can students find good pieces for musical theatre auditions? By listening to lots of musical theatre recordings and going to see as many shows as possible. Sheet music can be found in music stores, at local libraries, or purchased at websites like MusicNotes.com. Then it’s time for them to practice and see what works for them. Students should try singing along with the recording or getting the sheet music and trying to sing it for themselves. Here are some things to think about when selecting a song for a musical theatre audition:
• Is the sheet music in their range (meaning, is it within the lowest and highest notes they are able to sing)? Do they have to push or strain to get through the song? If not, are they able to transpose the song into an easier key for them to sing?
• Is the song a solo song (one character singing) or a song sung by multiple people? Too often I have heard students trying to use a duet song, sung by two different characters, and make it sound like one person is singing it. It tends to sound weird. There are tons of wonderful solo songs out there – leave the duets and group numbers for fun with friends.
• What is the gender and age of the character singing the song? What is the context of the song within the show? What happened just before the song, to push the action of the song? These are all important for the student to know, to help them make good acting choices while performing their song. Wait – students need to act while they’re singing? Yes indeed! It’s not enough to just sing the song beautifully. Students must show the emotions of the character through their vocal inflections, volume, facial expressions, and physical gestures. Some musical theatre auditions will ask for ONLY a song to be presented (no monologue) and so students need to prove that they can act and sing at the same time!
Teaching Drama
Creating Your Audition Toolkit – Monologues
Finding the perfect monologue for an upcoming audition is often challenging. Students want to have the best piece possible, but may not know how to go about finding a good monologue, or what even constitutes a “good” monologue. When it comes down to it, every monologue is different, and any individual monologue will be useful for certain shows but not so great for others.
A great resource for drama students is to create their own personal monologue notebook. This is simply a collection of monologues that they have discovered, learned a bit about, and copied out. When that student decides to audition for a show, they will then have a handy resource at their fingertips that they can use to help them find an interesting and engaging monologue. Teachers, creating a classroom monologue notebook for your students would also be a very useful resource – you will have a starting point for your drama students when they are looking to find a piece for any upcoming auditions, competitions, or classroom assignments.
So print out these instructions and create your own resource!
How to create a monologue notebook1. Start looking for great monologues right away, and always be on the lookout for new and exciting pieces. Going to see shows (and getting inspired!) and reading lots of plays can be very time-consuming, but it’s worth it.
2. Start a notebook or binder for collecting interesting monologues that you find. Divide your notebook into four sections:
• modern/contemporary comedic
• classical comedic
• modern/contemporary dramatic
• classical dramatic
It’s useful to divide your monologue collection in this way so you can pinpoint exactly what you’ll need for each audition. It’s important that your monologue be of the appropriate tone and time period for the show you are auditioning for. Trust me! This is coming from an actor who once auditioned for a production of The Caucasian Chalk Circle with Kate’s final monologue from The Taming of the Shrew. Guess what? I was not cast into the show. That particular monologue was definitely not the best choice for auditioning for that show. But it could be perfect for auditioning for the role of Beatrice in Much Ado About Nothing!
• Teachers, if you are creating a monologue book as a class resource, you may want to further subdivide the monologues: male, female, and gender flexible monologues – or older versus younger students.
3. When you find a monologue, make a copy of it and add it to your notebook. Be sure to note the name of the play it came from, the author of the play, and the name of the character that says the monologue. You’ll also want to include details such as the time period the show takes place in, any pertinent information about the character (age, their role/purpose in the show, and so on), and what happened to the character just before or just after the scene containing the monologue. This will help you to delve deeper into the character when you use the piece for an audition.
4. Identify the character’s emotion in the monologue and think of adjectives that describe that character. What is the character going through during the monologue? This way you can tailor your monologue selection to something that is similar in feeling to the character you’re auditioning for.
• For example, if a monologue you found to add to your notebook is spoken by the character of Jo from Little Women, you might describe her as feisty, strong-willed, creative, or loyal. Her emotions would depend upon where in the script the monologue occurs. For example, Jo would feel completely different when she first meets Laurie than when she decides to move to New York.
5. Look for monologues that are “active” and are actually happening to the character at that moment. Look for strong emotions that will be interesting to embody and perform. There are lots of monologues out there that are just “and this happened and this happened and this happened” which is less than thrilling for the audition panel to listen to.
6. Wondering where to find great monologues?
• The best monologues generally come from actual plays. The best way to find those monologues is to read lots of plays and see what’s out there.
• Ask your drama teacher for their suggestions of some great (and not-so-great or overdone) monologues.
• Start by looking for monologues by characters who are around the same age and the same gender as you. This will help you to narrow down your monologue choices.
• Try not to use the first monologues that come up when you do a Google search for “monologues for teens” or some similar search. Those monologues are done over and over because they’re so easy to find, and they tend to make directors and drama teachers fall asleep.
• Need help getting started? There are some great monologues from Theatrefolk plays here: Theatrefolk.com: Free Resources.
7. When you do go on audition, make a note in your notebook about which monologue you chose to do for that show, any feedback you received from the director, and how you felt after your audition.
Once you’ve been on a few auditions, it will be useful for you to look back and see what’s working and what might not be the best choices for you. You may also notice that there is a monologue or two in your notebook that you never seem to use. If you do notice over time that a monologue doesn’t seem to be working for you, consider removing it from your notebook and passing it along – perhaps that monologue will be more successful in the hands of someone else.
Classroom Exercise
Three “Get to Know You” Games
One of the most common activities that occurs during a first drama class or rehearsal is some form of a “Get to Know You” game. Starting with games is not just a nice break for students who may have been sitting still and silent in other classes, but it’s a great way for them to learn each other’s’ names through “play” (yes, the double meaning was totally intended!).
While many games may seem simple or silly, they are a good way to gauge your students’ abilities and willingness to participate. Are they eager to jump up and get involved, or do they hang back? Why? Do they participate in some games but not others? Again, why? These observations can help teachers adjust and personalize lessons to fit students’ personalities and skills, or else challenge students and push them out of their comfort zones.
Here are three simple “get to know you” games to try at your next class or rehearsal. You can also use these as warmup games. At the end of the post, check out the link to a student reflection , about games and using them in the classroom.
Game 1: “ABC Name Game”This is a simple game—introduce yourself in your “loud actor’s voice,” then add something you like that starts with the same letter of your first name. For example: “My name is Kerry, and I like koalas!” Then the person next to you introduces themselves and what they like, and then re-introduces you. “My name is Sarah, and I like soccer… and this is Kerry, and she likes koalas.” You can either continue on, introducing one person at a time, or (for a big challenge) have the students keep repeating every single name and like until the poor person at the end has to repeat everyone’s name!
A fun alternative to this game that will get your students moving is the “Action Name Game.” Play the name game and add a gesture, pose, or action. Each person must repeat the names and actions, which will create a crazy dance by the end of the line!
Game 2: “Move Yer Butt”This is a fun, active game to get the students up and running around! It’s kind of like non-musical Musical Chairs. Everyone sits on a chair arranged in a circle, except for one person in the middle. Their goal is to get a seat! The student in the middle of the circle will call out “Move Yer Butt if…” and add a situation or characteristic that they have. For example: “Move Yer Butt if you have brown eyes!” Then anyone in the circle who has brown eyes must get up and switch seats with another person in the circle, while the person in the centre tries to steal a chair. Whoever is left without a seat comes up with the next “Move Yer Butt” topic.
Examples of situations and characteristics could include eye/hair colour, items of clothing worn, places you’ve travelled to, age/grade level, or things you like or dislike (foods, music, movies, etc.).
Game 3: “Mixer”This is a super-easy game that gets students moving and laughing. Students move around the room in various ways, depending on what the teacher calls out. For example: walking, hopping, jumping, sneaking, creeping, skipping, sliding, etc. The possibilities go on and on. At various times, the teacher will call out a random number and body part, like “four elbows,” “six toes,” or “three pinkies.” The students must quickly get in groups of whatever number was called and attach the named body part together! If there are people left over, they are “out.” For a more competitive game, those players who are “out” are eliminated. For a more cooperative game, have those who are “out” help the teacher pick the next way of moving or the number of body parts.
Variation
This variation encourages conversation. When students get into their “four elbows” groups, they must share the number of facts about themselves as the number of people in the group (i.e. three group members, three facts), or find that many things in common with each other (i.e. four group members, four similar traits among students).
Hope these games help with your next class!
Acting
How to Deal: Not Getting the Part You Wanted
Teachers: Not getting the part you want can be devastating! If you have a student who is unhappy with their casting result, here is a frank and honest list that you can share with your students. It is aimed at helping them deal with their feelings and the situation. Check out the casting reflection link at the bottom of the post.
Students, imagine this:
Your teacher announces that the upcoming school production is your absolute favourite show in the world. You are psyched! You sign up for an audition slot with your heart set on playing “that” role–your dream role. You’ve picked the perfect monologue and practiced it forwards, backwards, and sideways. You’ve read the entire script, memorized the vocal score, and watched the film version. You go into the audition and absolutely blow the audition panel away with your effort and enthusiasm.
Then, the cast list is posted. You scan the list–and there is your name! You’ve been offered the part of…the paperboy. Or the maid. Or Pirate #6. Either way, it’s not the role you had your heart set on. What do you do now?
It can be really hard to not get the part you want. Being an actor truly takes having a thick skin. What can you do to deal with this situation?
Try not to take the casting choice personally.
There are a myriad of reasons why a certain student is cast into a certain role, and you weren’t. Another student may have more experience than you, or perhaps they had a stronger audition. Perhaps they are older and have taken more drama classes, or their vocal range fits the character better. No matter what the reason though, I can guarantee the reason is not because your teacher thinks you’re a bad actor or a bad person! Your teacher clearly saw something in you that they liked, because you got a role. But sometimes we can get a bit of tunnel vision–we may think that we are the best choice for a certain role, but that doesn’t necessarily fit with the director’s vision.
Decide if you want to take the role or not.
Here is an idea that some students don’t think about–if the show is an extracurricular event and not part of a mandatory classroom assignment, you don’t have to take the role. You aren’t being forced to participate. Sometimes framing it in a different light can help you make a tough decision. Say no to the role. If it’s truly your dream show though, then really it shouldn’t matter what role you’re playing–you get to be in the show!
If you’re genuinely unhappy that you did not get the role you wanted and have the choice to not participate, then be professional. Quickly make the decision to not accept the role. Let your teacher know right away, so the role can be re-cast.
Ask the director what you could improve on for next time.
It’s not always easy to hear, but getting feedback from your teacher can be useful. Perhaps they were looking for someone with a higher vocal range, or wanted to cast a senior actor in the role. Perhaps you weren’t speaking loudly enough in your audition, or the monologue you chose wasn’t actually the best selection for this show. This information can help you improve your performance for your next audition, and give you insight into what you can work on during the rehearsal process for this show.
Bonus Tip: Make sure YOU ask for feedback from your teacher, rather than getting your parents to ask you. Your teacher will appreciate that you took on the responsibility of learning and improving your own performance.
Consider your mindset.
The way I see it, if you decide to stick with the show, you have two mental paths you can take.
If you’re bitter and resentful because you didn’t get the role you wanted, then you’re just wasting your and everyone else’s time in the show. It won’t be a positive experience for anyone. You might even earn a bad reputation with the teacher and rest of the cast for making the rehearsal process unpleasant.
But…if you accept the role you’ve been cast in and make the best of it, there are so many positives you’ll receive. You still get to be in your dream show. You can take this experience as a learning opportunity and remember why you love to do theatre. You’ll learn new skills and acting techniques that will make you a better performer and help you throughout your theatrical life. You’ll grow your theatre resume. You’ll make new friends and great memories throughout the rehearsal process.
What choice would you make?
Try, try again.
If you truly love theatre and performing, stick with the show. Keep auditioning and participating in future productions. No matter what role you’re cast in, every show is a new chance to learn and have fun. Remember that the director cast you into the show because they genuinely wanted to work with you and they thought that you would be a great part of the team. So, take that with you as a positive, and keep trying.
Kerry Hishon is a director, actor, writer, and stage combatant from London, Ontario, Canada. Explore her blog at www.kerryhishon.com.
Directing
Pros and Cons of Double-Casting
In theatrical terms, double-casting is when two actors are both cast in the same role, and take turns playing the role during alternating performances. It is different than casting an understudy. An understudy only performs when the actor in the role is away or ill. In a double-cast role, both actors are equally suited to playing the role. They share the responsibility that the role entails, while bringing their own subtle nuances to the performance.
Double-casting a role can mean more work for the director, but it also has many benefits. Let’s look at some pros and cons of double-casting, which might help you when you’re casting your next production.
PROSDouble-casting gives more opportunities to more students.
This is the biggest advantage of double-casting: it’s a great way to give more students opportunities in a show. It essentially gives you two actors for the price of one! Rather than competing for a single leading role, having two students share the role gives them both the chance to be a lead while taking off the pressure of having to carry the show themselves.
It also gives audiences a reason to come back and see the show again, so they can see both students play the role.
Double-casting gives directors the opportunity to approach the show and role(s) in different ways.
Every actor approaches a character differently, and double-casting gives students the opportunity to explore that. You could even go further with your students and block or choreograph scenes or numbers differently, depending on which student is playing the role! This way might be more challenging for all your actors, but it’s also a lot of fun.
If an actor is sick or injured, you have a built-in understudy.
I’ve actually seen this happen. In a double-cast production of The Drowsy Chaperone, one of the students cast as Kitty broke her ankle a couple of weeks before the show. It was unfortunate for that student, but as the role was double-cast, the alternate Kitty covered her performances. No muss, no fuss.
Double-casting can also be a preventative measure for roles that are physically or vocally demanding. Sharing the number of performances between two student actors reduces the risk of vocal strain or injury, simply because they are not working their bodies and voices so hard for a continuous amount of time. (Aside from legal reasons regarding the amount of time child actors are allowed to perform, this is a common reason why (in professional theatre) many child roles are shared between two or more young actors. A recent example of this is the Broadway and West End productions of Matilda, which featured three to four actresses sharing the title role.)
CONSEverything takes twice as long.
You can teach and direct both students at the same time, but each scene will then have to be rehearsed and reviewed at least twice (so both actors have adequate time to practice). When it gets closer to showtime, you will have to schedule runs for both students. It might be advantageous to have one student play the role at tech and the other student to play the role at dress.
On a similar note, unless your students are exactly the same size, you will need two of every costume.
You must have an even number of performances.
In a double-cast show, both students should have the same number of performances, to keep things fair. It is also important to ensure that they have an equal number of matinee and evening performances, so friends and family members have different chances to see their performance. It is also nice to be able to give one student the opening performance and the other student the closing performance, as those two performances are extra-special.
If you absolutely must have an odd number of performances, I tend to err on the older student having the extra performance. If they are both in the same grade, you will probably have to draw straws or draw names out of a hat.
There is a risk of comparison and/or competition.
They say “comparison is the thief of joy” and that’s especially true when it comes to students. It is imperative that students who are double-cast not be compared to each other, or the one held up higher than the other. Instead, foster a sense of teamwork. Both students should work together to make character discoveries, while celebrating the nuances that make each student actor unique. Your students will not approach the same character exactly the same way. One student actor may very well be stronger or more experienced than the other. But be sure to give equal time and energy to both students, to help them grow and learn.
If you have multiple double-cast roles in a production, you should come up with creative cast names that also denote equal billing. Avoid calling groups “Cast 1 and Cast 2” or “Cast A and Cast B,” as that implies one cast is better/more important than the other. When I directed The Little Mermaid with double-cast actors, our casts were called the “Sea Cast” and the “Land Cast.” A production of The Secret Garden had the “Door Cast” and “Key Cast.” This is a great opportunity to be creative with your naming systems!
Acting
There Are No Small Parts
Are small parts a major letdown, or are they “actor crack”? Here are 3 tips that show you and your students how to make the most of a small part.
1. Play that small part as if the character is the lead
Give your character everything you’d give them if you were playing the lead:
• A history, dream, focus, want.
• A family tree, an ethnicity.
• What’s the sickest they’ve ever been?
• Give them a secret.
• Are they secretly in love with someone? Another character in the show?
• Are they secretly plotting to kill someone?
• Are they secretly someone else besides who they say they are?
• Write the monologue they would deliver if they found themselves alone onstage.
• Write an outline of the play as if your character was the lead. How would the play be different? How would it be the same?
• For every entrance and exit: Where are they coming from when they enter? Where are they going when they leave?
• Do they want to be in the scene?
Now that you have all this background work—show it. You can’t upstage the action, but you can be a part it. Even if you have one line, use that one line to bring the character to life. Even if you have no lines, use your blocking and movement to bring the character to life.
2. Give your character a specific physical presence
An audience is not going to remember a character based on the content or number of lines that you say. They’re going to remember you based on the character you present. The most important thing to take away from that concept is that theatre is a visual medium.
The audience is first and foremost taking in the play by what they see. They’re looking, more than listening. To that end, how much time are you putting into the physicalization of your character? What visuals are you giving the audience? You can’t upstage the action but you can make sure an audience never forgets your moment.
Lindsay has never forgotten her experience of being 19 years old, with four words in a play, (Yes, Yes, Hello, Sorry) and getting applause every night. How did she do it? A big part was physicalizing the character.
3. Take inspiration from the big screen
If you’re feeling down about getting that small part, take some inspiration from the big screen. Look for roles in movies where an actor ran with just a single moment. Here’s an example where Alan Cumming takes a small role with bland dialogue and acts Tom Cruise (the world’s biggest movie star) right off the screen.
The bottom line is this: If you have a small part, you actually get to act. You don’t have to follow a path that’s already laid in stone in the script. There aren’t any rules, other than you can’t completely hijack the play. Don’t think of a small part as a lesser part. Think of a small part as the greatest acting challenge known to man. Are you up for it?
Directing
Casting Challenge: Not Enough Actors!
Our next casting challenge is the exact opposite of our last post. What happens when you have fewer actors than named parts in the script? This can be a great acting challenge for students, as it will entail some of them taking on multiple roles in the same show. But it can get quite busy and complicated trying to keep their various character tracks and costume changes straight!
Here are some suggestions for casting a show with fewer actors than named roles:
• Search for creative doubling opportunities. See what characters could logically be played by one person.
• Look for characters who only appear in Act One vs. Act Two.
• Look for characters that only appear in one scene and then don’t come back.
• Combine a group of similar roles into one role. For example, if your show has a big group of servants, all the servant roles become one single “Servant.”
• Reassign lines to other characters , if it can be done and still make sense. For example, I directed a show where we had three “bad guys” and one of the three actors dropped out of the show two weeks before the show opened. We weren’t able to get a replacement, so we took that actor’s lines and dispersed them between the two remaining “bad guys.” (Don’t forget–you must always get permission from the playwright before making changes to the script!)
• Creative quick-changes. Can students change costumes to become another character? Oftentimes a hat or jacket can make a big difference. But even without a costume change, this is a great chance for students to focus on really changing physicalities, voices, and mannerisms between characters! Two examples of this are the musical The Toxic Avenger and the play The 39 Steps, where casts of five and four actors (respectively) play a huge multitude of parts, often in the same scene! In The Toxic Avenger, there is even a song where one actress who plays two different roles sings a duet between those two characters–at the same time!
• Consider cross-gender casting. Nine times out of ten you will have more girls than boys auditioning for shows. If you have an overabundance of girls, can a female actor play any of the roles? (Be sure to decide whether or not the girl will be playing a boy role as a boy, or if the character will be changed into a female– i.e. Simon becomes Simone, etc.)
ExerciseThe following exercise challenges students to cast a show using their classmates, and then forces students to figure out how to recast the show when their classmates are taken away! Have each student complete this exercise individually.
1. Select a play or musical that the class will use for the basis of this exercise. (If you are already studying a particular production in class, so much the better.) If possible, select a play or musical with approximately the same number of named roles as there are students in the class.
2. Individually, students will cast the play using the dramatis personae (character list) in the script. They will also use their knowledge of the play itself and their classmates’ skills and dramatic ability. Students should include themselves on their cast list.
3. Once students have completed their lists, the teacher will put each student’s name on a slip of paper, and put the slips into a hat. The teacher will then draw out 25% of the slips of paper. For example, for a class of 20 students, five names will be drawn. These students now cannot be cast in the show.
4. Students must go back to their lists and create a second list, recasting their show without those five students in the mix. How will they reassign roles?
5. Students will note the reasons for their recasting choices below their second list. For example: “Jamie will now play the roles of both Ms. Carling and Miss Jones, because Ms. Carling only appears in Act 1 and Miss Jones only appears in Act 2.”
6. Then, after students have recast their show with one quarter fewer actors, the teacher will draw out 25% more names (going back to our first example, in the class of 20, now only ten names will be remaining). Now these students also cannot be cast in the show.
7. Students will go back to their second list and create a third list, recasting the show with only half the number of actors they originally had. Again, they must note the reasons for the recasting below their third list.
8. Students can get as creative as they wish for doubling and ensuring all the roles are covered. Depending on which students’ names get pulled out of the hat, you may end up with too many students of one gender–perhaps “Lord Smythe” becomes “Lady Smythe,” or perhaps a girl just ends up playing a male role. Maybe one student has a scene where he performs all the characters by himself, or perhaps another student plays every single “one-off” role themselves, with a multitude of quick-changes! The students’ intended casting will end up very different than what they originally intended. But as they say, “the show must go on!”
9. Once students have completed all three lists (including creative solutions for casting challenges), they will complete a reflection and submit all four pieces for evaluation.
Directing
Pros & Cons of Callbacks
Imagine this: You’ve just completed your audition for the school production. You’re feeling really confident and happy with your performance. You can’t wait to find out who is going to be playing what role. But wait! It turns out that sometimes there’s an extra step before casting is released–the callbacks!
A callback is an invitation to the actor, from the director of a show, to take the next step down the audition path. It means that the director has seen something in an actor that they liked and wants to see them again. Callbacks can be extremely useful in casting a show, but they aren’t always necessary for every production.
Are you considering having callbacks for your next school production? Here are some pros and cons to consider.
PROSCallbacks give you a chance to see students again.Depending on how many students audition, it can be difficult to make casting decisions based on one short interaction with them. Also, some kids don’t always give the strongest audition performances, despite their talent. Having callbacks gives you the opportunity to see students perform again, often in a different situation. Callbacks can consist of reading from the script, presenting different audition pieces, a dance or movement exercise, improvisation–whatever works best for your production.
Callbacks can confirm or alter your casting decisions.Here’s a scenario: You think that Maya is perfect for a certain role in your show. She’s a senior, has lots of experience, and is a confident performer. But then Katie really surprised you with her audition. She’s only in grade 10 but she really worked hard and you can see a spark there. Calling both students back can give you more focused time with them and help you to make that tough choice. Have students read the same scene and see how their performances stack up.
Callbacks can help to check chemistry between students.Lots of shows have character pairings that are integral to the plot of the show, like romantic relationships, family members, or even rivals. Callbacks can give you the chance to try different pairings to see what works well. Try having different pairs read scenes together, and then mix up the pairings and try them again. You’ll have a clearer vision of what pairings work well (or, don’t work at all!).
Callbacks can assess the dedication of the students involved.Callbacks are a great way to gauge students’ attitudes and how committed they are to the project. Are they willing to spend another day trying to get the part? Are they happy to have gotten called back, or are they upset that they weren’t given the part outright? Are they organized enough to get themselves to the callback? Have they taken steps to prepare for the callback?
CONSCallbacks take more time out of your schedule.If you do decide to hold callbacks, you will need to plan ahead. You will have to arrange another date to hold the callbacks, and ensure you have a venue or location booked. If you need scenes or sides, you’ll have to prepare them in advance. You will also have to decide what course of action you will take if a student you’d like to call back cannot attend the callback session. Will you arrange an alternate time to see them, or will that take them out of the running?
Callbacks can be the cause of emotional rollercoasters for your students.There are many emotional responses your students might feel in regards to callbacks:
• If they get called back and then don’t get “that” part they had their heart set on.
• If they get called back but then don’t get any part. (I have heard of this happening–you will need to be very upfront with your students on whether or not a callback guarantees a role.)
• If they don’t get called back at all–does this mean that they are in the show or not? (Some teachers may choose to only call back for some roles but not others–again, be clear with your students on whether a callback means they’re in or not.
The most important thing to remember is…The most important thing to remember when dealing with callbacks is to be very clear with your students. What do callbacks mean? When and where will callbacks be? What should students expect to do at the callbacks? Do they need to prepare anything in advance? Are you calling back for all roles or just some? Does getting a callback guarantee a role? If you don’t get a callback, does that mean the student is even in the show?
The more information you can provide your students, the easier callbacks will be for everyone involved!
Kerry Hishon is a director, actor, writer, and stage combatant from London, Ontario, Canada. View her blog at www.kerryhishon.com.
Acting
Auditions Exercise Part 2: Mock Auditions
The following is Part Two of our Mock Audition Exercise, which allows students to practice preparing for and presenting an audition in a safe environment. Click here to read Part One.
Outside of preparing an audition for a show, students don’t often have the chance to “practice” auditioning. But auditioning is a skill that can be practiced and improved. I have used this exercise every year with my newest drama students. While it can be a nerve-wracking experience, students always report afterwards that they feel more confident and are glad that they went through the process.
Part One of the exercise consisted of selecting a monologue and recording it on video–almost like creating and submitting a first draft of an essay. For Part Two , students will refine and prepare that monologue to present in front of the entire class.
How do we refine a monologue for presentation?
1. Take note of notes.In Part One, students selected a monologue, identified important points about the content of the monologue, and noted WHY this monologue was good for an audition. They memorized the piece, practiced it at home, and presented it for a partner, who recorded it on a digital camera or smartphone. The students then viewed the recordings, took notes on their own performance, and received notes from their partner.
Students will take the notes they received from their partner and compare them to the notes they made on their own performance. Have them consider the following:
• Are your partner’s notes similar to or very different from yours?
• What did your partner notice that you overlooked?
• Do you agree with your partner’s critiques? Why or why not?
Students must think critically about both their own and their partner’s notes. If the notes are about performance technique, like “You kept looking at the floor” or “It was hard to hear you,” these are items that can be fixed right away.
Other notes may take some more thought, and students may need to go back to their partner for clarification. For example: If their partner said, “I didn’t understand who you were supposed to be talking to in your monologue” or “It was hard to tell how you were feeling during your monologue,” students will need to figure out how to make that clearer. Do they need to alter their volume, intensity, facial expressions, or gestures?
2. Revisit the monologue.Once students have their notes, have them go back and revise, refine, and rehearse their monologues again. It is up to you whether they do this during class time or at home as homework.
The revisiting period can be difficult for students, as they might feel like they’re just “going through the motions” and not really using their time effectively. Students must remember to take their notes and really apply them. Focus on both technique (memorization, diction, projection) and performance (understanding the text, embodying the character, displaying emotions, using facial expressions and appropriate movements).
3. Perform the monologue for the class.Students will present their audition piece, live, in front of the entire class. As in Part One, students should “slate” their audition performance, by first stating (in their own voice, out of character) their name, age or grade level, and the title of the play and playwright of their monologue. For example:
“Hi, my name is Susan Jones, I’m in grade 9, and my monologue is from the play Hoodie by Lindsay Price.”
4. Class feedback (optional).If you wish to do so, after each student performs their monologue, open the floor for classmates to give that student feedback. Be sure to encourage useful praise and constructive criticism, rather than simple compliments or putdowns. Alternatively, students may feel more comfortable writing down their feedback and handing it in anonymously. In this case, be sure to have students include at least one thing that the performer did well, and one thing that they could improve upon for next time.
5. Evaluation.After each student performs, fill out an evaluation rubric for that student, which can be downloaded below. Students will also fill out a short reflection.
Here are some things to look out for:
• Memorization (First and foremost!)
• Volume (Could you hear what the student was saying?)
• Diction (Were they speaking clearly?)
• Emotions (Did the student display emotions through their face, voice, body language, or did they just stand and talk?)
• Appropriate gestures/facial expressions
• Posture/body language
• Habits/tics (Were these character choices or the student displaying nervousness? These could include things like playing with hair, smoothing clothes, swaying, shuffling feet…)
• Focus (Could you tell who the student was speaking to in their monologue?)
Distance Learning Adaptation
1. Students may use the same monologue provided to them in Part 1: Perform on Video (if Part 1 was done). Alternatively, students may choose a different monologue from the prepared packet, or select their own monologue. It is up to the discretion of the teacher whether or not they must submit the monologue ahead of time for approval (on length, content, appropriateness, etc.) or if the teacher will permit students to select and perform whatever monologue they wish.
2. If your students have completed Part 1 (Perform on Video), have students take the notes they received from their anonymous peer and apply them to their audition performance as they see fit. Allow students time (either in class or on their own time as homework) to refine their monologue performances.
3. It can be tempting for students to try and “cheat” and hide their monologue somewhere (such as on their keyboard or taped to the wall behind the webcam) to avoid having to memorize their piece. Before students perform, give a demonstration of the difference between reading a monologue and performing a memorized piece. Have students point out the differences in the performance. Remind students that memorization is an important part of the auditioning and performing process. (Discuss why!)
4. Using a video conferencing app such as Zoom, students will perform their audition monologues one at a time, live for the rest of the class. It is up to the teacher whether students may volunteer to go first, or if the teacher will decide the order – either a pre-planned order or a random, surprise order. You also may wish to have students sign up for audition order slots.
5. Have students “slate” their audition pieces before performing: “Hi, my name is Ken, and my monologue is from Somewhere, Nowhere by Lindsay Price.” Pause, and then begin the monologue.
6. Consider whether the rest of the class will keep their cameras on or off during their peers’ performances. Keeping cameras on gives students the feeling of performing for an audience, while turning cameras off may help students feel less nervous with fewer eyes knowingly looking at them. You may wish to have students give their thoughts on this during a class discussion. (Alternatively, this question could be posed as a reflection: for example, “How did you feel having other students watch you?” or “How did you feel knowing other students were watching but not being able to see them?”)
7. [Optional] Have the rest of the class write a brief response to each student’s performance, noting one thing the student did well and one thing they could improve upon for next time. Once all the students have performed, students will submit their feedback to the teacher, who will amass all the feedback and copy it to a document for each student (removing response names and any inappropriate responses). The teacher should also include their feedback at the bottom of the sheet to give to the student.
(This step is optional because for some students, just performing in front of the rest of the class is enough of a challenge.)
8. Post-exercise discussion and/or reflection questions:
• List the differences between performing on video versus performing live on camera.
• Which is more difficult? Why?
• If you were a director, would you rather have students submit a recorded audition, or audition live? Why?
Acting
Pros and Cons of Cold Readings
Theatrical “cold reading” (also known as “sight reading”) is where actors read aloud from a script, scene, or text with little to no advance preparation. Actors are handed a script and expected to familiarize themselves with the text in a short amount of time, then present a great performance. It’s an important skill for student actors to develop and practice. Cold readings can be used at auditions instead of OR in addition to prepared monologues, or during callbacks.
If you’ve always run auditions with prepared monologues, mixing it up with cold readings can be useful. Let’s look at some pros and cons of choosing cold readings for your next round of auditions.
PROSHear the sighs of relief everywhere–no need to prepare a monologue!Many students avoid auditioning because selecting and preparing an audition piece can be stressful. What if I pick the wrong piece? What if I forget my lines? What if someone else does the same monologue? Cold readings can alleviate that stress and may encourage more students to come out and audition. Because everyone will present the same material, that concern is alleviated. And while it is great if students can quickly memorize the lines and not have their faces stuck in their scripts, memorizing isn’t expected during cold readings.
Cold readings are great for group auditions.Cold readings lend themselves well to group auditions. Students can come in pairs or groups for an assigned amount of time and try a selection of pieces with different people. You could also specifically put students in groups who aren’t friends or don’t know each other well, to see how students interact with the unknown. This is also a great way of seeing if there is chemistry between student actors, or whether a certain pair or grouping works well together.
Students can perform a variety of characters.It’s good to have a selection of cold reading pieces available so students can try playing some different characters. You might make some interesting discoveries that you hadn’t considered before. (For example, a student who is often serious and quiet in class might prove themselves to be a great comedian when presented with the right material!) It’s also a good way to see if students are NOT right for a certain part.
You can see if students are able to take direction.With cold readings, it is expected that students will be given different directions to try. You can have a student perform their lines first excitedly, then mix it up and have them read the lines angrily. While you can definitely do this with prepared monologues, students tend to memorize their audition pieces in a specific way. Having them try something different can really throw some students off. With a script that they are less familiar with, there’s more room for play and experimentation.
CONSMore preparation is needed on the part of the artistic staff.The teacher or director will need to make appropriate selections for the cold readings in advance and ensure that there are lots of copies available for the audition day. The copies should be clearly labeled with the character’s name and gender, so students can make appropriate choices.
Cold readings can be difficult for students who aren’t strong readers.Students with reading challenges or disorders (like dyslexia) can struggle with cold readings. Since they have to focus so much harder on just comprehension, it can be harder for them to read aloud and emote at the same time. You may wish to have cold reading materials available ahead of time for these students.
Students may not realize that they still need to “do the work” before they audition.With cold readings, it’s very easy for students to just show up, stand there, and read. Students are strongly encouraged to read the play in advance of their audition to familiarize themselves with it, and get a sense of what they might have to perform in the audition and what roles might be a good fit. Be sure to ask students questions during the audition about the content of the play or about the characters, to gauge whether or not your students did any preparatory work in advance.
Kerry Hishon is a director, actor, writer, and stage combatant from London, Ontario, Canada. Explore her blog at www.kerryhishon.com.
Acting
Auditions Exercise Part 1: Perform on Video
The following exercise is the first of a two-part class exercise (Part 2 will come later this month), giving students the opportunity to practice audition prep in a safe environment. Although auditioning is a skill that students can practice and improve, students don’t always have the chance to do so outside of preparing an audition for an actual show. This classroom exercise will give them that opportunity.
This exercise is broken down into steps that push students to make smart choices when selecting their monologue, when performing it, and when looking critically at their performance. Part 1 consists of selecting a monologue and recording it on video–almost like creating and submitting a first draft of an essay.
Part 2 consists of students refining their monologue and preparing to present for the entire class.
1. Selecting a MonologueStudents will select a monologue that they would like to work on–but not just any old monologue. Before students select their monologue, you should set out parameters for them to follow. Consider the following:
• Length of monologue
• Style of monologue (comedic or dramatic, contemporary or classical)
• Where the monologue comes from:
• Ideally, the monologue should be from an actual play. It is up to you whether you wish to allow students to select a monologue from a different source, like a play, musical, novel, long poem, movie, online source, book of monologues, monologues that you or your students have written…
• Theatrefolk has some great, free monologues here!
• If you wish, you can be even more specific and select which plays/playwrights students must select their monologue from.
• Be sure to mention that the monologue must be memorized. (This should be a given, but students will still ask.)
For the exercise, give your students your parameters and the Monologue Selection Handout to complete ( get the sample version below ). For example:
“Students will select a 45-second to 1-minute long monologue. The monologue should be from a contemporary play and may be comedic or dramatic. The monologue must be memorized and may not be from a film or television show.”
2. Preparing the MonologueStudents rehearse their monologues (it is up to you whether this is done during class time or at home as homework). Encourage them to focus on fully performing the material: memorization, emotions, facial expressions, appropriate movements, diction, and projection.
Talk to students about what it means to prepare a monologue for an audition. They have to showcase their best work in a short period of time. How will students showcase themselves through action, expression, diction, and projection?
3. Performing the Monologue on VideoStudents select a partner, and using a smartphone or digital camera, their partner will record them performing their audition piece (and vice versa). Students should “slate” their audition recording, by first stating (in their own voice, out of character) their name, age or grade level, and the title of the play and playwright of their monologue. For example:
“Hi, my name is Susan Jones, I’m in grade 9, and my monologue is from the play Hoodie by Lindsay Price.”
4. Viewing the RecordingAfter both partners have recorded their audition pieces, they will watch the videos back and complete both a self-evaluation and an evaluation of their partner’s performance. On the evaluations they will note three things that they/their partner did well, and three things that they/their partner can improve upon for next time.
Here are some things to look out for:
• Memorization (First and foremost!)
• Volume (Could you hear what your partner was saying?)
• Diction (Were they speaking clearly?)
• Emotions (Did your partner display emotions through their face, voice, and body language? Or did they just stand and talk?)
• Appropriate gestures/facial expressions
• Posture/body language
• Habits/tics (Were these character choices or actor displays of nervousness? These could include things like playing with hair, smoothing clothes, swaying, shuffling feet…)
• Focus (Could you tell who your partner was speaking to in their monologue?)
Students will then submit their video files, self and partner evaluations, and monologue selection handouts for you to evaluate.
Distance Learning Adaptation
1. Depending on the size of your class, select a number of monologues that would be appropriate for students to perform for this exercise. There should be a minimum of four monologues: one comedic, one dramatic, one classical, and one contemporary. Be sure to include characters of different genders. Include the title of the play, playwright, character name, and one-sentence synopsis of the monologue. Prepare these monologues into a document that can be shared with your students.
2. In class, go over the monologues with your students. Have volunteers read aloud each of the monologues. Have students identify what type of monologue each one is, and why it would be a good choice for an audition.
3. Have students choose a monologue from the options you provided to memorize, rehearse, and record at home.
4. Students will record themselves on their devices performing the memorized monologue. Have students slate their audition, however, ask students not to include their last names or grade level if you upload the videos to a private YouTube channel or class website, for privacy purposes. (“Hi, my name is Jamie, and my monologue is from the play Hoodie by Lindsay Price” should be sufficient for this exercise.) Instruct students on how to safely and accurately submit the video footage to you for evaluation purposes.
5. Send each student another student’s audition video. The students will evaluate the video performance they receive, indicating three things that the auditioner did well and three things that could be improved upon for next time. Since students are working with technology, ensure that the evaluations focus more on the actual performance over technological issues (evaluating students can include that information – such as background noise, echoes, or weird shadows in the recording – but that may be something the auditioning student has little to no control over). Students will submit their evaluations to the teacher, who will send the notes anonymously to the auditioning student.
6. Have students review and consider the notes they received. They will write and submit a written reflection on the following:
• Do you agree with the feedback given to you? Why or why not?
• What was the most useful piece of feedback you received? How will you put that feedback to use?
• What is the difference between feedback and criticism?
• Given the opportunity to re-record your audition, what (if anything) would you do differently? Why?
Kerry Hishon is a director, actor, writer, and stage combatant from London, Ontario, Canada. Check out her blog at www.kerryhishon.com.
Production
Preparing for Auditions from the “Other” Side of the Table: 5 Tips for Success (and Sanity!)
All right! You’ve decided on the show your school is going to produce this year. You’ve obtained the performance rights and paid for the royalties. You’ve got the show dates in place, and you’ve booked the venue. Now, the next step is to assemble a cast–which means auditions!
The following five steps will help you to get organized for the upcoming auditions. The more you have planned out in advance, the smoother your audition day will run. You can also check out Theatrefolk’s Ultimate Guide to Holding Effective Auditions.
Step 1: PUBLICIZE
How will you spread the word about your auditions? You’ll need to get flyers or posters for sure. If your school has a newsletter, website, or social media, you should also use those avenues. In the audition notice, include the dates and times available to audition (as well as callback dates, if you wish to have them), whether students can drop in or if they need to book an appointment, and what students will need to prepare for their audition (a prepared monologue, song, cold read, or something else).
Step 2: PLACE
Where will auditions be located? Do you have to book a room in advance? Be sure that whatever location you choose is clean and bright and has adequate space for both the actual auditions and a waiting area for the other audtioners. If possible, try to cover any windows or keep the door shut for the privacy of the student currently auditioning and for the nerves of the other students waiting to audition.
Step 3: PEOPLE
Who will watch the auditions? Is it just the director (or, if it’s a musical, is it just the musical director and choreographer)? Or will it also include producer, stage manager, and/or someone else?
I highly recommend having an assistant to help outside the audition room, acting as a “waiting room” attendant. This person helps people sign in, collects information sheets, takes photos of the students (if you haven’t worked with them before), answers questions, and keeps order outside the audition room. This way you are free to focus on the auditions. This person can also secretly keep an eye on students and report back to you about their behavior before and after the auditions. Was a certain student disturbing others while they were waiting? Were they quiet and shy? Were they polite to the other students? These observations can be extremely useful in the casting process–you want talented actors of course, but you also want to work with students who are nice (not divas)!
Step 4: PAPERWORK
Auditions often require a lot of paperwork, such as:
• Sign-up sheets for before the audition
• Sign-in sheets, so you can see who actually showed up for the audition
• Signs indicating where auditions are being held
• Information sheets (a free template is available to download below)
• Blank paper to take notes
• A calendar with rehearsal and show dates
• Extra copies of the script (and score, if applicable)
• If you are doing cold reads, copies of the scenes that students will read from
Be sure to have all these prepared ahead of time!
Step 5: “PROPS”
It’s best to set up your audition space ahead of time so you’re ready to go on the day of auditions. Here is a list of items you’ll need to make your life easier on Audition Day:
• A table and chairs for the artistic team (you might want a second table and chairs outside of the audition room if you have a “waiting room” attendant)
• Paper and pens/pencils for taking notes
• A camera to take photos of the students to attach to their information sheets
• A clock, to keep you from running over time
• If you are directing a musical, you’ll need a CD player or an iPod dock for playing accompaniment tracks and/or a piano or keyboard for your accompanist
With a little bit of planning ahead, your auditions will run smoothly–one less thing to have to worry about. Good luck for your upcoming auditions!
And don’t forget to check out Theatrefolk’s Ultimate Guide to Holding Effective Auditions!
Acting
The Ultimate Audition Guide: Teacher Edition
Auditions happen everywhere at every level, from middle school plays, to high school musicals, to college admissions. Audition styles range from prepared monologues, to cold readings, to group activities. No matter the audition, directors go through the same set of emotions, issues and concerns:
• Will I be able to cast my show?
• What am I supposed to be looking for?
• How do I stop the kids from getting so nervous?
The Ultimate Audition Guide: Teachers takes you through the audition process and provide suggestions for the above questions. Auditions don’t have to be nerve wracking experiences!
What’s in The Ultimate Audition Guide: Teachers?There are Seven sections:
• Preparing for Auditions
What should you do to best prepare for auditions?
• Choosing the type of audition
Which is the best audition for your production?
• Activities to help your students ahead of time
How can you prepare students to audition effectively?
• Activities during auditions
How can you calm student nerves?
• Audition Day
What to focus on during auditions.
• Make It A Teaching Moment
How can you assess an audition?
• Dealing with the aftermath
How do you deal with student and parent discontent?
Start the new year off right with a great audition. Break a Leg!
Acting
The Ultimate Audition Guide: Students
You may be familiar with our The Ultimate Audition Guide: Teachers – did you know we have a student version?
Students go through the same set of emotions, issues and concerns when auditioning:
• Will I get the part?
• What if I don’t even get cast?
• What if I forget the words?
• How do I stop being so nervous?
The Ultimate Audition Guide: Students takes you through activities and exercises you can give students to prepare them for the task of auditioning for a show, program, or class.
Auditions don’t have to be nerve wracking experiences! Coach your students to prepare themselves to give their best piece ever.
What’s in The Ultimate Guide to Auditioning: Students?Here are the sections:
• Choosing material
• What goes into choosing a great audition piece?
• A senior extra credit exercise that will help your future auditions.
• A class exercise in choosing appropriate material.
• Preparing material
• What steps should students take when preparing a monologue?
• Character Profile, Physical Profile, Vocal Profiles.
• Preparation Reflection.
• On the day
• What should students do right before their audition?
• Pre-audition exercises and a handout for students.
• Dealing with the aftermath
• How do students deal with not being cast or unexpected casting?
• An aftermath reflection.
Not all students know what it means to prepare effectively for an audition. Give them the tools they need to do so.


