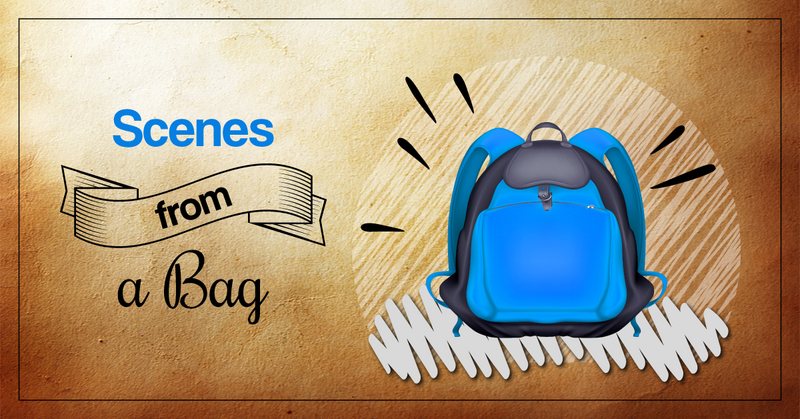
Facebook Pixel Skip to main content

📣SCRIPT SALE! Treat yourself to an easier Fall. Save 30% on 5+ perusal scripts with code SPRING30 before May 3 and head into summer stress-free.

Improv

Improv Game: Creative Defiance
Classroom Exercise

Improv Game: Creative Defiance

The core tenet of improvisation is “Yes, and…” To keep the scene going, each participant must agree with any suggestion that is brought forward, and add something on. It’s a balance of giving and taking, and listening to each other. Teamwork is key. Participants look good by making their fellow group members look good. In this game, the cardinal rule of improv is turned on its head. In groups, two students work together to keep a scene going, while a third student breaks the “Yes, and…” rule by disagreeing and taking the scene in another direction, leaving the rest of the team to follow along. The purpose of “creative defiance” is for students to practice thinking quickly on their feet and problem solving, while staying cool under pressure. It’s a challenge no matter what side of the scene you’re on. This exercise can be done live in person, or online using a video conferencing program such as Zoom or Google Classroom. Directions:1. Divide students into groups of three. Select one student to be “No” and the other two students to be “Yes.” 2. Give each group a scene starter, such as a situation (baking a cake, climbing a mountain, taking a test), a location (the doctor’s office, on holidays in Spain, an underground lair), or a starting line. This could be as simple as “Good morning class!” or “Can you believe what they said?” or as complicated as you wish. 3. The two “Yes” students will start and perform the scene following the rule of “Yes, and…” by agreeing with what is currently happening in the scene and adding something to push the scene forward and give their group members something to work with. For example: If the opening line is “Can you believe what they said?” a less than helpful response would be something like “What did they say?” or “I can’t believe it!” because while they are continuing the scene, they’re not offering any material for their partner to play off of. A better response would be something like “I know! Caitlin told Jeremy that his shoes were hideous. Frankly, I think she’s right.” Students are challenged to think quickly and make a decision. 4. The third student (“No”) will follow the rule of “No, and…” They will disagree or change what their group members have suggested, but they can’t just disagree – they must also come up with something different for the scenario. From the previous example, one of the “Yes” students said “I know! Caitlin told Jeremy that his shoes were hideous. Frankly, I think she’s right.” The “No” student might say, “That isn’t right, Caitlin told Sherry that she’s terrible at math” or “You heard wrong, it was Jeremy that said Caitlin’s whole outfit was hideous, and Caitlin cried all night about it.” The “No” student disagrees with what is said, and gives some different piece of information to their group. 5. The “Yes” students need to go with whatever the “No” student says and figure out how to continue the scene while following the changes that have been presented. This can be frustrating or stressful – it is up to the “Yes” students to stay calm and cool and do their best to keep the scene going. The challenge for the “No” student is to keep coming up with different, interesting ways of changing up the scene without resorting to obnoxious behaviour, giving repetitive or one-word responses, or shutting down. The goal of the “No” student isn’t to kill the scene (although that might happen), but to push it in a different direction and keep the rest of the group on their toes. 6. Keep the scenes brief. Be sure to cut groups off before students get too frustrated or run out of ideas. It’s likely that the scene may die organically – it’s challenging for students to have to constantly switch directions. But you may have to give them an out. 7. Discuss with the group members: • Did the scene work? Why or why not? • What did you try to do to keep the scene going? • How did you feel when one of the team members was constantly disagreeing with you? • How would you feel if someone acted this way in the real world? • What would you do/how would you respond to this person? Questions for the rest of the class: • Did the scene work? Why or why not? • How did you feel watching the scene? • Was the scene funny, interesting, or entertaining? Why or why not? • Why is the “Yes, and…” rule important when doing improv? • How can this exercise be applied to the real world? 8. If you have time, start the scene again with all students following the “Yes, and…” rule. Have students compare it with the previous scene. 9. As an alternative challenge, select 1-3 students to act as referees. They will watch the scene carefully, listening for rule-breaking (such as the “No” student disagreeing but not offering a new piece of information, or the “Yes” student not going with new information presented) and giving strikes for rule-breaking. If a group member gets three strikes, they are out, and another student will jump in and take their place. You may wish to end the class with a brief relaxation exercise or do something silly, like a dance party, to ease any tension or frustration that may have arisen from doing this exercise.
Warm-Up Game: Buyer & Seller
Teaching Drama

Warm-Up Game: Buyer & Seller

This improv warm-up game helps students think quickly and creatively, listen to their peers, and choose their words with care. It can be done in person in the drama classroom (with physical distancing if necessary), or virtually using an online platform. Materials Needed: • Stopwatch or timer • Item(s) that students have handy (in their bags or rooms, around the classroom, etc.) 1. Select a student to be the Seller. They will choose one item to sell. This item can be anything they have available to them – a hat they’re wearing, a pencil from their backpack, a teddy bear from their room, the chair they’re sitting on, etc. The item should be shown – it’s not a secret or a guessing game. 2. Select three students to be the Buyers. Decide in what order the Buyers will participate (first, second, third). 3. The job of the Seller is to sell their item to each of the Buyers within two minutes. They should show and describe the item. They can demonstrate how to use it, list its attributes, ask questions, and so on, using descriptive words and actions. 4. The job of the Buyer is to listen to and respond to the Seller’s sales pitch. They must reply to the Seller, but there’s a catch – they cannot use certain words when responding. • They cannot use the words YES, NO, or the name/direct description of the item. • For example, if the Seller’s item is a pencil, the Buyer cannot use the word pencil, writing utensil, etc. • The Seller can still use the banned words and in fact, they can try to trip up the Buyer into saying the banned words. 5. The teacher will set a timer for two minutes. Within the two minutes, the Seller must attempt to sell their item to each of the three Buyers in turn. 6. The teacher and the rest of the class will observe and listen for the banned words. If the first Buyer says one of the banned words, they are out and the Seller moves on to the next Buyer. 7. Once the time is up, choose a new Seller. If the second or third Buyer didn’t get to participate (because the first Buyer used up the full two minutes), they will be the Buyers for the new Seller. 8. Have a brief post-game discussion or have students complete a reflection: • What was the easiest part of this game? The most challenging? Why? • How can the Seller angle their sales pitch to try to trip up the Buyer into using the banned words? • How can the Buyer phrase their responses to avoid using the banned words? • How can this exercise help you become a better actor? 9. Extra Challenges: • Choose additional words that the Buyer cannot use. For example, not using the word “I” would be a big challenge! • Have the Seller try to sell to as many Buyers as possible within the two minutes. Hold a class competition to see who can sell to the most Buyers. • If you are studying a play or having a class production, have students sell and buy in character. • Give the Buyers and Sellers each an acting quirk, such as an accent or an ailment (e.g., they can’t stop sneezing or yawning).
Character Development Game: What’s For Breakfast?
Classroom Exercise

Character Development Game: What’s For Breakfast?

This is a simple and fun improvised game that is great to use in your show rehearsals. I’ve found it’s especially useful for younger, newer, or shyer students, who might be afraid of looking silly onstage. But it’s a great challenge for more experienced students as well. The purpose of the game is to challenge students to think beyond the world of the script, to experiment with “going bigger” with their character, and to explore their character’s likes, dislikes, and mannerisms in a deeper way. It can be used as a warm-up game before getting into the bulk of your rehearsal work, to get students’ minds out of school mode and into rehearsal mode. For this game, students will improvise the following scene individually, in character in their assigned role, using the following framework: 1. The character enters a place where food is served. This could be the character’s own kitchen or dining room, a restaurant, a banquet hall, etc. Whatever the student chooses, they must establish the location clearly. 2. The character decides what they want to eat for breakfast. What does the student think their character would eat? A simple bowl of cereal? A four-course meal? A slice of leftover pizza? Some hardtack bread with salt pork? 3. The character obtains the breakfast food. How do they do this? Do they prepare the meal themselves? Do they demand that a servant brings them their meal? Do they order their meal from an app on their cell phone? 4. The character eats a few bites of the breakfast food. Do they eat their food daintily or do they gobble their meal? Are they ravenous or not very hungry this morning? Are they still sleepy after getting up? Are they dressed or still in their sleepwear? 5. The character realizes they need to leave, and exits. What is the reason they need to leave? Do they leave willingly or reluctantly? Do they take their unfinished food with them? Do they clean up after themselves? Does anything else happen? Students are allowed to speak and move around the room as they wish. The only item needed for this game is a chair or a rehearsal block in case the student wants to sit down to eat their breakfast. Students aren’t required to use the chair though – perhaps their character stands to eat their breakfast. Any props or food items should be mimed. Scenes need not be long – one minute or less is perfectly fine, provided the student hits all five points. This game helps students to think about their character outside of the world of the play. Let’s say you’re doing Romeo and Juliet as your school show. What would Benvolio choose to eat for breakfast? What about Lady Capulet, or Prince Escalus, or Friar Laurence? Would Tybalt prepare his own meal or have a servant bring him his food? Would Mercutio eat breakfast at a fancy restaurant or at a fast food joint? It helps them to explore and make choices about their character. There isn’t a right or wrong choice – students just need to make the choice and commit to it. You can expand on this game by having two students improvise the breakfast scene together. In this case, students are not only challenged to complete all five tasks in the framework, but also while interacting (in character) with the other character. After completing this game, students can reflect on their experience using the included Reflection. Distance Learning Adaptation ImprovisationStudents will complete the improvisation at home by following the same steps as described in the existing exercise. One at a time, they will exit the frame of their webcam and re-enter, in character, to begin the scene. They will finish their scene by exiting the frame, pausing, saying in a loud, clear voice “SCENE” and coming back to their device. Breakfast AnalysisStudents will write and submit their answers to the following questions, answering in full sentences: • Where does your character usually eat their breakfast? (Kitchen? Dining room? Banquet hall? Bedroom? Outside? Somewhere else? Describe the location.) • What are your character’s preferred breakfast foods? (Something simple, like cereal or toast? A multi-course meal? Leftovers from dinner? What do they drink? Give a sample meal.) • How does your character obtain their meal? (Do they prepare it themselves? Does a servant bring it to them? Do they order the meal from an app on their phone?) • How does your character eat their food? (Describe it using adjectives. Are they dainty or do they gobble? Are they ravenous or not very hungry? Are they still sleepy? How are they dressed? Describe their place setting.) • What does your character do at the end of the meal? (How and why do they leave at the end of the meal? Do they finish or leave food behind? Do they take any leftovers with them, do they clean up after themselves, is the space left messy or neat? Does anything else happen?) • What do you think your character’s breakfast choices say about their personality?
Onstage “Awareness” Improv Game: Sit, Stand, Kneel
Acting

Onstage “Awareness” Improv Game: Sit, Stand, Kneel

Being aware of your surroundings is a vital part of being an actor. Students must know what’s going on around them at all times. This is important from a theatrical standpoint – unless otherwise directed, the flow of movement must be smooth and specific. The characters go where they need to go and move where they need to move in order to tell the story. As well, students must be mindful of what their fellow performers are doing at all times. They need to keep their focus not only on their own lines and blocking, but ensure that they are blending in seamlessly with the rest of the performers and helping to elevate the story of the scene in a positive way. Spatial awareness is also vitally important from the perspective of pure safety. Students can’t be tripping over others, banging into sets, and stumbling over props and furniture. This is especially important if they are doing a lot of movement, such as dancing, tumbling, or stage combat. Students need to be aware of their surroundings at all times so they don’t hurt themselves or their peers. Clear communication is important, even if it’s not verbally announced – students must be observant and aware at all times. This is doubly important if something goes wrong, such as if a fellow actor trips and falls, or a prop is accidentally dropped or broken onstage – which will inevitably happen at some point. Spatial awareness, non-verbal communication, and observation skills can all be practiced with the popular improv game called “Sit, Stand, Kneel.” It is often used to help students explore levels in a scene to make it more dynamic and visually interesting, which is another benefit to the game. “Sit, Stand, Kneel” seems simple (and slightly silly) when you first explain it, but it can be challenging when students get up to try it. The game is played as follows: • Three students perform an improvised scene. • Assign a setting, such as in a doctor’s office, at school, on a movie set, at a picnic, in the jungle, etc. • This keeps the scene focused but fairly open-ended. • At all times throughout the scene, one student must be standing, one must be sitting, and one must be kneeling. • When one student changes position, the other two must adjust accordingly. For example, if the sitting student stands up, the standing student must either kneel or sit. If they choose to kneel, then the kneeling student must also change to whatever the other two students aren’t doing. • Here’s the tricky part: Students can only stay in one position for a maximum of five seconds. If you want to play the game with two students, reduce the game to “Sit, Stand.” If you have up to five students per group, include “lying down” and/or “standing on a chair/rehearsal block.” The challenge is for students to not only be aware of what their group members are doing and adjust their movements accordingly (without obviously saying “I’m going to stand up now”), but also to try and have their movements make some sort of sense with the scene that they are performing. For example, if the scene is set in a doctor’s office, perhaps the student sitting is the patient, while the kneeling student is the doctor taking their temperature, while the standing student is a nurse examining an x-ray. However, how does that change when the “patient” decides to stand up? What action or line provokes the change? Do the “doctor” and “nurse” notice, and how do they react? How does this affect the flow of the scene? Have your students try the game, and then reflect back on their experience.
What’s The Worst That Could Happen?
Classroom Exercise

What’s The Worst That Could Happen?

This improv game is inspired by The “What If” Game but takes it to a bigger, more ridiculous scale. This version of the game combines brainstorming, improvisation, risk-taking, thinking on your feet, and really going big! It can also help students to address potential fears and concerns they may have about something going wrong during a performance, and to shift their mindset from one of panic or worry to coming up with a creative solution. Instruction• As a full class, brainstorm a list of ideas for scenario prompts on the topic “What are all the things that could possibly go wrong in a show?” Big, small, ridiculous, catastrophic, this brainstorming session is no holds barred – write it all down. (Use our “Brainstorming: Coming Up With More Ideas Than You Need” post for some great brainstorming tips!) • Divide the class into groups of four. One group at a time will perform. • Select a scenario for each group to perform as an improv. Here are some examples: • The auditorium catches fire mid-show • Every single student gets the flu the morning of the show • The set falls apart mid-show • The two lead actors, who have been secretly dating during the rehearsal process, break up during dress rehearsal • One shoe from each pair of costume shoes mysteriously disappears • One student starts the improv scenario, then a second student joins in, followed by the third and fourth. • Remember the principles of improv: Each student must have a character, and the scene needs to have a beginning and end. • Each time another student joins the scene, they bring with them a new idea, character, or situation that builds upon the scenario. For example, with the scenario where the auditorium catches fire mid-show: • Student 1 (playing a student actor) starts the scene “onstage in the show.” • Student 2 (playing a member of the tech crew) runs on yelling that the auditorium has caught fire. • Student 3 (playing another student actor) limps in, having literally broken their leg running from the fire. • Student 4 (playing a firefighter) enters to put out the fire, only to have no water in their hose. • The students have to work together to come up with an ending for the scene. How they end the scene is entirely up to them. Continuing on with the fire scenario: Perhaps the characters escape the fire (or maybe some escape and some don’t); perhaps they band together and somehow put the fire out (magically blowing out the fire together, throwing water from the bathroom on the fire, or creating a choreographed fire-extinguisher dance); or perhaps they decide to finish the show despite the fire. • The rest of the groups will then get a chance to perform in whatever order you choose. You may wish to give each group the same scenario but require them to come up with different ideas/characters/situations within the scenario, or give each group a different scenario to improvise. Be aware that throughout the process of this game, students may share their own “horror stories” of shows gone wrong from the past (which can freak out less experienced classmates), or express their true fears about an upcoming production or performance. As much as possible, give your students the chance to share their concerns, whether that be through class discussion, individual reflections, performance, or another method of expression. Encourage them to pause, take a step back, and think about how these fears can be addressed. Focus on coming up with practical ideas (even small ones!) to help alleviate the issue, rather than just concentrating on the fear and worry.
Using Improv to Address Fear of Failure
Classroom Exercise

Using Improv to Address Fear of Failure

Fear of failure is a huge concern in drama class. Nobody wants to fail – it’s not a good feeling, and students are hyper-aware of not only their own feelings, but their perceptions of what others in the class think of them. Making a mistake can be paralyzing because students are afraid of looking foolish, unintelligent, or unaware in front of others – so they often won’t even try a task without a huge amount of anxiety. However, the following improvisation game, The Alphabet Improv Game, is great to try with your students because it’s a pretty challenging one. It is inevitable that your students are going to make mistakes and “fail” while playing it, because even the most seasoned improv performers find this one difficult. The point is to try the game, make mistakes, and see that making mistakes is not the huge deal that students can make it out to be. The goal is that your drama students will realize that everyone makes mistakes – it’s not just them, stuck in their own heads. And at the same time, they get to have a lot of fun! InstructionThe Alphabet Improv Game is played as a full class. • Have students sit in a circle. • Select three to four students to start the scene. • Have the rest of the group choose a location (e.g. supermarket, classroom, movie set, theatre rehearsal, corporate office, desert, jungle). • The first group of students will start the scene. However, each sentence spoken by a new person must start with the next letter of the alphabet, from A to Z. (Each word in the sentence doesn’t have to start with that letter.) • Students need to listen carefully and remember what letter they are currently on! • For example, if the scene is taking place on a movie set: 1. Student 1: “Annnnnnd…action!” 2. Student 2: “But soft, what light through yonder window breaks?” 3. Student 1: “Cut, cut! Can you do that again, please? We can’t hear you!” 4. Student 3: “Don’t speak so quietly.” 5. Student 2: “Everyone else on this set can hear me…can’t you guys?” …and so on. • If a student starts their sentence on the wrong letter or repeats a letter that was already used, then they have to sit down and the next student in the circle replaces them. The scene continues on, with the new student either taking on the same role or coming in as a different person. The location remains the same. • If there is a long pause and none of the students can think of the next sentence, all of the current students have to sit down and the next three to four students in the circle replace them. They pick up from the last letter used. So if the last line was “Man, it’s so hot out here!” then the next sentence must start with N. • The scene must be completed by the time the students get to the letter Z. Then the scene may start again with three to four new students in a new location until the full class has had the opportunity to play. • If your students find this game too easy, have them go through the alphabet backwards, from Z to A! If your students ask, there is no prize or reward for one person/group being able to complete the game in one try. This is not a competitive game and that’s not the point of it. After each student has had a chance to participate, have a debrief conversation with the class. How do they think they did? What were the easiest and most challenging parts of the game? How did your students feel if they made a mistake? If you notice students are getting overly critical of themselves, acknowledge that there is always room for improvement but that everyone makes mistakes and it’s completely normal to do so. Then ask them to discuss positive moments that arose while playing the game. They will explore their thoughts further while completing an individual Reflection. Distance Learning AdaptationsAlphabet Warm-Up (Full Class) • The goal is for students to recite the alphabet out loud, from A to Z, one person at a time. One student says “A”, another student says “B”, another student says “C”, and so on, without following an assigned running order. • If two students say the next letter at the same time, or a letter is skipped, the group starts over at A. Students cannot cue or coach each other, or give visible hints. • Ask students: What is the purpose of this exercise? What are the benefits to students of doing this warm-up? Alphabet Storytelling (Full Class) • Determine a running order of students. • Students will tell a story, one sentence at a time, starting with the letter A. The next student will start their sentence with the letter B, and so on, from A to Z. (Each word in the sentence doesn’t have to start with that letter. See the example in the article above.) Students must focus on starting with the correct sequential letter, as well as ensuring their sentence has a specific beginning and ending, and that it makes sense with the story topic. • If a student starts their sentence on the wrong letter or repeats a letter that was already used, they are out. The story continues on until the students reach Z. • Once students are able to tell a story with an assigned running order, try the exercise again without a running order. Students will need to listen that much more carefully to avoid interrupting each other. Virtual Alphabet Improv Game (Full Class) • This game can be played using a video conferencing program, pretty much exactly the same way as the in-person version. Assign 3-4 students to create an improv scene, and have the rest of the students ready to jump in if a letter is missed or a long pause occurs. If you wish, determine a running order for participating students in advance, so students know when they are “on deck.”
“What did you say?” Active Listening in the Drama Classroom
Classroom Exercise

“What did you say?” Active Listening in the Drama Classroom

““Most people do not listen with the intent to understand; they listen with the intent to reply.” -Stephen R. Covey” How many times have you been giving instruction in class and when you get to the end, someone throws up their hand with a question you already answered IN the instruction? How many times do you have to repeat yourself in a day? OR, how many times have you been listening to someone talk then realize that you have no idea what they’re saying? When most people talk to each other, they’re not fully listening. They are thinking about what they are going to say. They’re distracted and not focused solely on the speaker. Communication is a 21st century skill. But communication is not a one-way street. It’s not just the job of the speaker to say something. Communication needs a listener – it needs an audience. If the listener isn’t a participant in the process, then communication is blocked. ““Listening is a magnetic and strange thing, a creative force. The friends who listen to us are the ones we move toward. When we are listened to, it creates us, makes us unfold and expand.” -Karl A. Menninger” The drama class is a great place to work on listening skills. Not only is it a skill that students can use both inside and outside the classroom, but there are many theatrical pieces that benefit from active listening: • Improv works best when students listen and respond to each other, rather than trying to come up with something funny. • Scene work takes on a new life when actors actively listen to each other instead of just waiting to say their next line. Scenes become living conversation, not rehearsed dialogue. • To be an engaged actor on the stage, you have to listen to what’s going on around you, even if you’re not participating in the scene. When something goes awry or a line is dropped, if you’re paying attention then you can help get a show back on track. • And as audience members, students need to learn how to actively listen to get the most out of what they are watching. What does it mean to be an active listener?To be an active listener means you’re fully focused on what the speaker is saying. No looking at your phone during a conversation! You’re also giving nonverbal and verbal cues that demonstrate you’re listening: Nonverbal Cues • Eye contact • Body language (head nod, forward body posture) • Smiling Verbal Cues • Not interrupting • Asking questions and asking for clarification • Summarizing • Paraphrasing Also: Active listening is not judgemental or preachy. It’s not wanting to put your stamp on the conversation. You may not agree with what the other person says, but you do fully listen to what they have to say before you respond to them. How can I apply this to the classroom?There are a lot of active listening exercises that you can practice in the classroom. These would be especially useful at the beginning of the year as students get to know each other and learn to work with each other within a drama class context. Students who can actively listen to their peers in a conversation are going to be better group members and scene members. They will also work towards building a better classroom community. Active Listening Exercises• Modeling: Have a student come up to the front of the class and instruct them to start a conversation with you on a topic. It might be helpful to give them a topic: What did you do in your previous class? What is your favourite type of music and why? As they talk, model the difference between a distracted listener and an active listener (using the nonverbal and verbal cues). Afterwards, ask the student to compare what it was like to try to talk to someone who was distracted vs. someone who was actively listening? • Story Share: This can be done as a large group discussion, or you can divide students into groups of four to make it more low-risk. Ask students to share a story about when they felt that they weren’t being listened to. What was the situation? What was the outcome? What did it feel like to not be heard? • Variation: Divide students into pairs. One person shares their story, the other listens. After one minute, stop the groups and ask a couple of listeners to paraphrase the speaker’s story. How closely were they really listening? • Variation: Do this as a group scene. Divide students into groups and have them create a scene in which a character wants to be heard and another character(s) will not listen. If students are having trouble coming up with a situation, suggest a parent/teen or teacher/student scenario. Variation: Ask a group of volunteers to do an improv scene. Pull one of the volunteers aside and instruct them to not listen to their fellow actors and to respond accordingly. Afterwards, discuss with the class about what it’s like to try to act with someone who is not listening. • Learn About: Students listen to each other in groups and then recall what they learned. • Divide students into groups of three. Each group decides who is A, B, & C. • Have A start. They have 30 seconds to talk to B about their favourite things: music, food, movie, tv show, colour, subject, thing to do after school, etc. • At the end of 30 seconds, B turns to C and tells C what they remember about A’s favourite things. • B then talks to C for 30 seconds about their favourite things. • At the end of 30 seconds, C turns to A and tells A what they remember about B’s favourite things. • The cycle repeats with C talking to A, and then A telling B. • Discuss this exercise as a group. • How hard was it to listen to someone for 30 seconds? • What new thing did you learn about someone in your group? • What did you learn about the way you listen to someone? • After a minute or two, ask someone to share what they remember about another member of their group. After time has past, do they still retain that information? • Conversation Pause: Students engage in a conversation where only one person can talk at a time. When another person wants to respond, they have to wait 5 seconds before doing so. • Divide students into pairs/groups of three • Each group has to have a conversation. It may help to give them a starting point topic: family, sports, cafeteria food, friendship, dating, gossip, smoking. • Only one person is allowed to talk at a time. • Once a person has finished what they have to say, everyone has to count to five before another person can respond. • Discuss this exercise as a group. • What was it like to have to pause before you could speak? • What were you thinking about in the pause? • Was it hard to let only one person speak at a time? • What did you learn about the way you act in a conversation? • The end of the word: Stand in a circle. Start with a word – “Telephone.” The person beside you has to come up with a word starting with the last letter of the first word – “Egg.” The next person does the same – “Gold.” Students have to listen and respond. Start slowly and gradually increase the speed. Set a timer (1 or 2 minutes) and see how many words you can get in that time. You can also start this exercise with smaller groups of 4 or 5 which is lower risk for beginning drama students. Improv GamesImprov games are an excellent place to work on listening skills. These two game descriptions (Interrogation and Make-A-Story) come from Drama Teacher Academy instructor Jennine Profeta and appear in her course Coaching Improv. Interrogation: The “criminal” has to guess their location, accomplice, and crime based on the clues that the “interrogators” give. • Begin by sending one person out of the room, or offstage to the “soundproof” booth (which could be the person standing with their hands over their ears). This is the Guesser/Criminal. • While the Guesser/Criminal is “offstage,” set a chair in the middle of the stage and get three suggestions from the audience: a location, a celebrity accomplice, and a crime (i.e. a pet peeve). • Repeat back the three suggestions to make sure that everyone (including the audience) is on the same page, then invite the Guesser back to the stage. • The Interrogators then try to get the Guesser to confess their crime by giving them clues (beginning with Location). • The key to this game is that everyone needs to speak in assumptive statements or the game doesn’t go anywhere. Questions like “where were you?” and “what did I do?” don’t help. If the location is “dentist’s office”, then clues like “you can’t handle the tooth!” will help the Guesser figure out what’s going on, while statements from the Guesser like “Stop drilling me!” will let the Interrogators know they’re on the right track. • Once the Guesser knows what the location is, they say it aloud. (“Alright, alright! You got me! I was at the dentist’s office!”) The Interrogators then move on to clues for Celebrity Accomplice. • Once Celebrity Accomplice is guessed, move on to the Crime. • Finally, the Guesser sums up all three: “I picked my nose at the dentist’s office with Beyoncé!” Make a Story: The goal is to make a seamless story among various players. • Have a group of 6 to 10 students line up in a row. • Start by getting a suggestion from the audience. (“May I have the title of a story that’s never been written…???”) • After receiving the suggestion (i.e. “The Best Day Ever”), repeat it back – this is to ensure that the players have heard it. • The Conductor points at one player who starts telling the story and keeps talking until The Conductor points at someone else. Have the next player pick up where the last improviser left off – have them do it as seamlessly as possible (even if it’s mid-word or mid-sentence). • Keep pointing at players and telling the story until you feel it is done.
“Improv Community” Game for Drama Students
Classroom Exercise

“Improv Community” Game for Drama Students

This improvisation game is great for students who are brand-new to improvisation. It focuses on students going with the flow and joining in the scene, rather than trying to one-up another and “force the funny.” One of the most important aspects of improv is the concept of “yes, and…”, which keeps the scene going. Students must accept then build onto their peers’ suggestions. For example: If one student says, “It sure is hot here in Florida!” their scene partner cannot reply with, “What are you talking about? It’s -30 degrees here in Winnipeg.” The scene would be officially dead! Improv CommunityWith the game “Improv Community,” the focus is on listening and going with the flow. Divide students into groups of 5 to 6. The larger group size encourages more listening and being fully aware of what’s happening. Assign each group a scene where people would interact a great deal, like a kindergarten classroom, a busy shopping mall, or a fitness centre. One student will start the scene, and then each member of the group will join in. Students don’t have to join the scene alone; they can grab another group member and have them join in at the same time. The trick is that the other students must go along with it! Example Let’s use the example of the kindergarten classroom. The scene could start with one student acting as the kindergarten teacher and setting up the room, and the second person to come on might be one of the kindergarten students, dragging their parent (a third student) in to see their classroom. The fourth, fifth, and sixth students might be additional kindergarten pupils, another teacher in the school, a principal, a special guest for show-and-tell… The possibilities are endless! Students don’t get any time to prepare – since this is improv, all thinking has to be done in the moment. Encourage students not to come up with wild ideas or crazy scenarios. They need to create and commit to a real, honest character, and react appropriately to what’s going on around them. Most Important Rules The most important rule of “Improv Community” is that only one actor can speak at a time. That way the scene doesn’t devolve into everyone yelling at or over each other. This teaches students patience and listening skills. They need to work together to make the scene happen, while also listening to each other, so they can figure out when to say what their character wants to say. The second rule of “Improv Community” is that each participant must speak at least three times during the scene. This will prevent one student from dominating the scene. Here’s how the kindergarten class scenario might go: Student #1 (teacher): Good morning Susan! How are you today? Student #2 (Susan): I’m OK, Mr. Smith. I brought my mom to school today. Student #1 (Mr. Smith): Hi, Mrs. Jones. What brings you in today? Student #3 (Mrs. Jones): I wanted to speak with you regarding a problem Susan is having with another child in the classroom. Student #4 (another parent): Excuse me, Mr. Smith! I need to speak with you. It’s an urgent matter regarding my son Joseph! Student #1 (Mr. Smith): I’ll be happy to speak with you about your concerns about Joseph, Mr. Gray, once I finish speaking with Mrs. Jones. Student #2 (Susan): Hi Joseph. Student #5 (Joseph): Hi Susan. Want to play trucks? Student #2 (Susan): Sure, as long as I get to be the blue truck. …and so on, until each student has spoken three times each. Notice that once a character has been established, the student stays as that character. Of course, improv scenes don’t use a script, but this gives you an idea of how the scene might go. It’s simple, straightforward, and that’s all it needs to be.
Scenes From A Bag
Acting

Scenes From A Bag

Scenes from a Bag is one of my most favourite theatre games. It can easily become one of those “takes over the whole class period” games because it’s simple and fun for students. This game is useful for practicing improvisation skills, working with different people, thinking on your feet, and exploring lots of different characters and scenarios in a short amount of time. Scenes from a Bag is exactly what it sounds like – an improvisation game lovingly adapted from the improv television show Whose Line Is It Anyway. (The original game from Whose Line was called “Scenes from a Hat” but I changed it to “bag” because the first time I played this game in a classroom, we had only a brown paper lunch bag to draw slips from. Whatever works!) Students divide up into pairs. For each pair, draw a slip of paper with a two-person scenario from a bag and have that pair improvise the scene. Each scene needs to have a beginning, middle, and end, and should be timed (between 1-2 minutes) to ensure all pairs get a chance to perform, and to keep the scenes from going on too long. The key to ensuring that the scene works is to remember the most basic improv rule: “Yes, and…” Whatever is established in the scene is the reality for that scene, and students must go along with it. For example, if one partner says, “Oh my goodness Kate! I can’t believe we’re on an African safari!” the other partner cannot turn around and say, “What are you talking about? My name is Ben and we’re working in an office right now.” That totally kills the scene. Go with whatever is brought to the scene! Scenes from a Bag can be played as simply as each pair drawing a slip and then performing in turn, but there are lots of variations you can employ in your classroom. If you come up with a great variation, please share it with us! Here are just a few variations to get you started: Partner Variations: * Students choose their own partners. * Two students’ names are drawn from a second bag to become partners. * Students divide into two teams. Each team selects a member of the opposing team to perform in the scene. Scenario Variations: * Students choose scenarios prepared in advance by the teacher. * Students brainstorm a list of scenarios and submit them to the teacher, who selects the best ones to put in the bag. * Students choose their own scenarios out of the bag. * Someone else (the teacher or another student) chooses the scenario for the pair. Gameplay Variations: * Partway through the scene, the teacher calls out “switch” and the pair switches roles. For example, if Partner A was playing a dentist and Partner B was a patient, after “switch” is called, Partner B becomes the dentist and Partner A becomes the patient. They then continue the scene. * One pair starts the scene. Partway through, the teacher calls out “freeze” and another pair “tags in” and finishes the scene. * One pair starts the scene. Partway through, the teacher calls out “ailment!” and gives one of the partners an ailment to add to their character. For example, the students may be acting out a scene where they are paddling a canoe down a creek. Suddenly one of the partners has a broken arm / comes down with a case of the chicken pox / realizes they are being chased by a shark / etc. (The possibilities are endless!)
12 Days of Classroom Exercises
Classroom Exercise

12 Days of Classroom Exercises

We’re counting down the 12 Days of Christmas with 12 of our most popular Classroom Exercises! No matter which holidays you celebrate, these exercises are a useful tool to keep in your back pocket – and every exercise comes with a free download for immediate use in the classroom! 1. Devising Exercises 2. “Worst Case Scenario” Exercise 3. “Improv Games for Collaboration” Exercise 4. “Monologue Evaluation” Exercise 5. “I Would Never…” A Pre-study Romeo & Juliet Exercise 6. “What’s in Your Bag?” Character Development Exercise 7. “Instagram Journaling” Expression Exercise 8. “Collaboration Games: One to Twenty” Warm-up Exercise 9. “Relationships in Romeo & Juliet” Exercise 10.“Indoor Clouds” Playwriting Exercise 11. “Playing with Change” Devising Exercise 12. “Reality vs. Illusion” Exercise
Top Ten Tips for Teaching Improv
Teaching Drama

Top Ten Tips for Teaching Improv

Guest blogger Jennine Profeta is a Second City performer and theatre educator, as well the instructor of the Drama Teacher Academy course Yes, And… How to Teach Improv. She shares her Top Ten Tips for Teaching Improv with us here! Tip #1 – There are no wrong answers.There are no wrong offers. Students are very reticent sometimes to put something on the table. They’re scared that they’re not going to say the perfect thing. Don’t worry about perfect. Just put something out there and know that things are going to spin out from it. Tip #2 – Improv is overwhelming.You can just choose from anything in the world and students are afraid that they’re not going to say that perfect thing, that they’re not going to be funny, or they’re not going to be able to contribute anything. We are aware of this and we’re going to address this. Tip #3 – Improv is a team sport.We are in it to win it together. We’re all friends, we all support each other, we all help each other out. When we do shows, a lot of us have adopted this thing called “I got your back” so we go around and we tap each other on the back and say, “I got your back” because, again, it’s a reminder that it’s a team sport. Tip #4 – Keep physically open.Students tend to cross their arms, cross their legs. I know I stand in a crossed arm position because it’s comfortable sometimes, but it’s also defensive and it shuts us down. You’re actually not really able to listen as well when your body is crossed. Get them to open up – uncross those arms, uncross those legs. Sometimes you have to remind them several times throughout a class. Tip #5 – Listening.It’s all about communication and collaboration, so we need to listen to each other. All acting is about reacting and improv is this in the purest form. You have to be able to listen and to react to your partner. Tip #6 – Focus on the wins and the challenges.This is an important tip when giving feedback – as opposed to focusing on what is right and wrong. Just focus on the wins. There is no wrong in improv as long as we’re listening to each other and supporting each other. Tip #7 – Emotion is your friend!I like that say that, in life, it sucks to be grieving. It sucks to be sad, to be terrified. But in the classroom, it’s a really fun thing to play with. It can inject a lot of fun and energy into your scenes. So, the more that they can embrace their emotions and just riff off of them, the more they’re going to have in their toolbox. Tip #8 – Funny, funny, funny.That should be a happy by-product of what happens. Not that we’re standing on the sidelines, thinking about the perfect joke. Improv is all about humor. We just want to start communicating our ideas, working on offers, listening, and accept the fact that the laughs are going to come as a result of this thing that we’re building together. Tip #9 – Avoid questions.We want to avoid questions in our scene work. Some students don’t want to commit to the scene or again they think that whatever they have to say is not good enough. So instead, they go into the scene and go, “So, what are you doing? What’s your name? Why are we here?” I stop and say, “Okay, let’s reframe it. Instead of a question, let’s make it a statement.” Say, “We are at…” and then you’ll watch them, like, “Uh… Disneyland.” Yes, perfect! That’s great. Tip #10 – Have fun.Every time I hit the stage, I like to play and have fun. In improv, there are often rules and structures that are introduced in a lot of the exercises and games that we play. It doesn’t mean that it’s not fun; those are there to help us have fun, to hone in on the points that we want to hit so that we can have a great time and just laugh. Want to hear more tips from Jennine? • Listen to the Theatrefolk Podcast Top Ten Tips for Teaching Improv. • Check out Jennine’s Drama Teacher Academy course Yes, And… How to Teach Improv.
Collaboration Games: Job Interview
Teaching Drama

Collaboration Games: Job Interview

Jennine Profeta, instructor of the Drama Teacher Academy course Yes… And How to Teach Improv always uses the game Job Interview in her classes. In this game, one student has more knowledge than the other, so they have to work together to reach a satisfying conclusion. Get your students into pairs. This is one of the few exercises where I do let students sit down in chairs. Standing keeps the energy up but this is a job interview scenario, so chairs are more appropriate. Some of your students might not have experience doing job interviews. You might have to give them a little bit of coaching about what happens in a job interview situation. Usually, we walk in and politely shake the other person’s hand, we hand over a resume and so on. Get the pairs to assign themselves as A and B. A is applying for a job but they don’t know what job they’re applying for. B is the employer and they do know what job A is applying for. They’re going to help A figure out the job. Once they’ve assigned their positions, huddle with B so you can give them a suggestion for the job – for example, flight attendant. B returns to their chair and the scene begins. As the interviewee, remind A that they can’t ask the question: “What job am I applying for?” We want them to make statements as they try and figure out what’s going on –“Oh, I really enjoy working with children. As you can see from my resume, I have extensive experience doing that.” This gives the interviewer something to respond to. If the job is for a flight attendant position, B might say: “That’s great that you have some experience with children. You will encounter some of them but a majority of our clientele are actually adults.” This would give A a clue about the job and they can respond to the new information. Encourage students to use statements and avoid questions. Every now and then, it helps that the interviewee lets their interviewer know what they’re thinking about. They might say: “You know, it’s always been my dream to be a pilot,” to which the interviewee could reply: “That’s fantastic, but we really feel like we need to start you a little further back first before we let you advance to the front of the plane.” B is letting A know that they’re on the right track but that they’re not exactly there. When our interviewee does know what’s going on, they state the job: “Thank you so much! I’ve always wanted to be a flight attendant. I can’t wait to join your organization” and that is the end of the scene. The students have to really work together on this one. In order to continue the scene, each participant has to help the other. Every sentence should build on the next as A tries to figure out what job they’re applying for. And remember, B wants A to get the job. Remind B to help and guide A through the scene and not to block their way.
Improv Games for Collaboration
Classroom Exercise

Improv Games for Collaboration

Here are some great improv games to work on collaboration skills. Word at a Time StoryStudents sit in a circle. Give them a title for a story. “The Best Birthday Ever.” The story is told one word at a time around the circle. Remind students that the story has to make sense. They are building sentences, not throwing in funny words to try and get a laugh. Everyone has to work together to remember where they’ve been and try to create a cohesive throughout. Family PortraitDivide the class into groups. Each group comes up one at a time and is given a title for a picture that revolves around a type of family. “Family of Dentists. Family of Cheerleaders. Family of Lost Librarians.” You can even get more specific. “Right after grandma’s big announcement” or “The Dentists Convention” or “Cheerleaders Lose the Championship.” Groups have ten seconds to form a portrait based on the title. Remind students to think about the characters involved in the picture and to talk to each other so that there are no repeat characters. They have to tell a story, even though they are frozen in place. A time limit forces students to work quickly. Count them down and at the end of 10 seconds yell out FREEZE! The end result should be a cohesive picture. Foreign Film DubA scene for a group of four. Two players act out a scene in gibberish. The second two players are their English Language “Dubbers.” They translate the scene into English. Tips for the scene – those using gibberish should use a lot of physical action to give clues to their translator counterparts. Also, keep the sentences short. Remember, the goal here is a cohesive scene. You have to work together as a team to make the best scene possible. Once the scene is complete, switch roles. Same CircleEveryone stands in a circle. Person A makes a small gesture. The person beside them repeats the gesture and so on around the circle. The point of the exercise is to keep the gesture exactly the same. Everyone has to concentrate and pay attention to the gesture. It’s not supposed to get bigger, or change hands, or twist. It must be repeated exactly. Harder to do than you think. You can do the same exercise with sounds. Group EnvironmentDivide the class into groups of 5. The first person in the group enters a space and mimes an action that defines an environment. Once another group member knows that what that environment is, they enter the space and perform a complementary action. This keeps going until the entire group is in the environment. Remind students that the key is to create a complete picture. They all have to work together in the moment and not try to add something that destroys the environment. Actor SwitchThree actors are given a situation and a character from the audience. They start a scene. At some point during the scene you call out SWITCH! The three actors now have to switch characters. That means they have to really listen to each other and be aware of who the other characters are, so that they can pick up another character at any moment. And remind students, the aim is to keep striving for a complete cohesive scene no matter what the situation. Story DeathFive actors line up across the front of the space. They are going to tell a story. Get a topic from the audience and then come up with a title. “The Best Underwater Adventure Ever.” You act as conductor in front of the line. When you point to an actor, they have to tell the story. The aim for the actors is to make the story seamless and always be ready to jump in to continue the story. If anyone stutters, freezes, repeats unnecessarily, the audience shouts out DIE! and that actor has to give themselves an imaginative (and of course imaginary) death scene. The bigger the better. Now there are only four people to tell the story. Get a new topic and give a new title. This continues on until there are only two actors battling it out. Don’t be afraid to get faster with your conducting or surprise an actor by going back to them immediately, keep them on their toes! HitchhikerA scene with three actors and three chairs. The scene starts out with a driver and a passenger. They start their conversation and in the middle of it, the hitchhiker approaches. The hitchhiker has to have a defined physicality, character, and vocal quality. As soon as the hitchhiker gets in the car, everyone in the car takes on his/her character. Keep in mind, the scene still has to continue. It’s not just be a funny character, there has to be a conversation. After a moment the drive comes up with a reason to leave the car and everyone slides over, returning to a neutral character. Then a new hitchhiker approaches with a different physicality, character and vocal quality. Cycle through your class so that everyone has the opportunity to play.
Top Ten Tips For Teaching Improv
Podcast

Top Ten Tips For Teaching Improv

Episode 136: Top Ten Tips For Teaching Improv Improvisation! Every student loves it, but does every teacher? Improv is one of those things that looks so easy but the tide can turn easily. When you have students who do nothing but try to be funny, and others who refuse to join one scene, it can get frustrating quickly. Listen in to hear Second City performer and long time teacher Jennine Profeta shares her top ten tips for teaching Improv.
Resolutions in the Drama Classroom
Classroom Exercise

Resolutions in the Drama Classroom

The start of a new year holds many promises. I will make a resolution! I will change my life! I will….do something for two weeks and then go back to my old way of doing things. Because there’s so much emotion behind resolutions – both positive and negative – they are excellent prompts: Journal Prompts• Will you make a resolution this year? Why or why not? • How do New Year’s resolutions make you feel? • What’s the last resolution you made? Did it stick? Why or why not? • Why do people make resolutions? • Why do people break them? Improv Prompts• Write the most bizarre resolutions on slips of paper (keeping it school friendly of course) and everyone has to put a slip in their pocket without reading it. The scene is a New Years Eve Party. On a signal from you, one of the participants has to bring out their slip of paper and incorporate their resolution into the conversation. • A conversation between a pro-resolution person and an anti-resolution person. Character Development Prompts• Is your main character for or against resolutions? Why? • What resolution would your main character make? Why? • Would they stick to the resolution they made? Why or why not? Writing Prompts• Write a monologue in which a very straight laced person shares an out of character resolution. • Write a scene between a character and their will power. Will power is waning as January marches on. • Write a scene between a boyfriend and girlfriend who have opposing resolutions. What will to do to the relationship? • Write a scene between someone who is trying to stay strong and something tempting – personify a piece of cake.