📣SCRIPT SALE! Treat yourself to an easier Fall. Save 30% on 5+ perusal scripts with code SPRING30 before May 3 and head into summer stress-free.
Lists

Teaching Drama
Your Drama Classroom Wish List
Some of the most interesting and creative theatre has been made without anything other than the brains and imaginations of groups of people. But having some fresh new tools, resources, and equipment in your drama classroom can really help to engage your students and help them take their creativity to new levels. With your students, take a look around your drama classroom and think about what could make your space that much better. Then, let yourselves think big with the following exercise. Use the printable worksheets at the bottom of this article to help your students stay organized.
1. Take stock of what you have in your drama classroom and what you wish you had. Think about the different areas of theatre and the tools and equipment you could use. Here are some ideas to get your wish list started:
• A stack of new plays to read and perform
• Practical and fun classroom resources
• Exciting new lesson plans
• A set of matching rehearsal cubes
• A classroom set of plain white masks for mask work
• A classroom set of hand puppets or a puppet theatre
• Classroom supplies (folders, pencils, tissues, hand sanitizer, sharpie markers, dry erase markers, etc.)
• Theatre or inspirational posters to decorate your classroom
• A set of foldable flats or risers
• Paint
• New or more lights for your lighting grid (or an actual grid itself)
• An upgraded sound system (tape recorder with Bluetooth, USB port, iPad, soundboard, microphones, etc.)
• A new stock of makeup and fresh applicators
• A gift card to a local costume shop or thrift store to replenish your costume stocks
• A portable projector and screen
• A rainbow of gaff and spike tape
• An electric keyboard or piano
• Storage containers
• Tool kits with hammers, nails, pliers, screwdrivers and screws
• A membership to the Drama Teacher Academy
2. Divide students into small groups. What do they think would be most beneficial to add to their drama classroom? Have each group choose an item and convince the class why it’s the most necessary. You might use the Elevator Pitch classroom exercise as a starting point and modify it so students can share the strengths, weaknesses, opportunities and threats of their chosen item. A SWOT analysis sheet is provided; click the link below.
3. Then, challenge students to figure out how they could acquire the item (or a similar item) in three different ways: for FREE, at COST, and if they had a CASH WINDFALL. These ways can be silly or serious but encourage students to envision at least one of the ways in a somewhat realistic manner. For example, let’s say a group of students thinks their drama classroom could benefit from a portable followspot with a stand. For their FREE solution, they might suggest using flashlights taped to broom handles as followspots. For their COST solution, they might compare brands on Amazon and fundraise with a showcase or bake sale or by singing telegrams. For their CASH WINDFALL solution, they might envision winning the lottery or getting a giant grant or sponsorship, and buying a whole fleet of followspots as well as a full professional lighting grid. Encourage them to think big! Each group will present their three solutions to the class.
This exercise may encourage you and your students to actually go about acquiring one (or more!) of the items on your wish list. Speak to your principal or school board about how you might be able to bring your wishes to fruition. Create a fundraising showcase or similar event with your students. See if your parent council has funds available for some classroom upgrades. Good luck!
Production
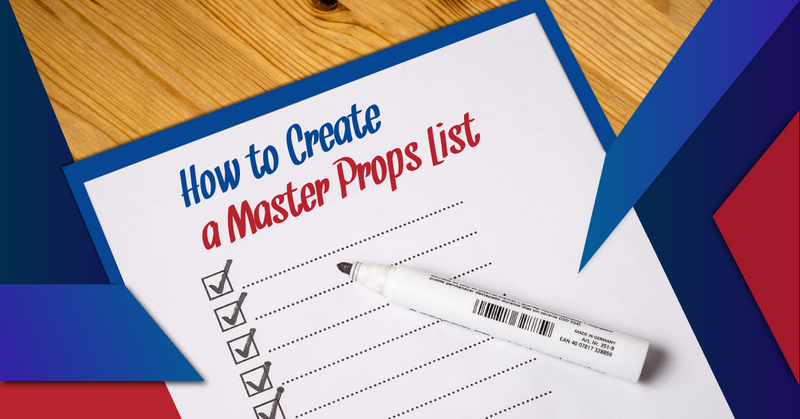
How to Create a Master Props List
Having a master props list makes everyone’s life easier when it comes to knowing exactly what props are needed for your show, how each item is being acquired, and if a certain prop actually exists. Creating a master props list will help immensely in keeping your team organized and on the same page. It will also help to avoid problems such as props being missed or duplicated, anachronistic or incorrect-looking props being provided, or having the wrong quantity of props. Use the following instructions to create a master props list for your upcoming production. You can also use this as a classroom exercise – instructions and Rubric are available below!
1. Create a spreadsheet (e.g. Excel, Google Sheets) with the following headings:
• Title of the show with show dates
• Name and contact information of the props head
• A brief description of the location of the show and time period (such as New Jersey, 1985). This way you won’t have to constantly include that information in the description (such as “80s style phone,” “80s style radio,” and so on).
• Sub-headings:
• Act-Scene
• Page #
• Item:
• What the prop actually is, in the most simple terms (e.g. book, apple, sword, phone, etc.)
• Description:
• Any specific look, colour, texture? (For example, there are lots of different types of telephones: cordless, rotary, cell, home phone, office phone, pay phone…)
• Quantity:
• How many props are needed?
• On:
• Who brings the prop onstage?
• Off:
• Who takes the prop offstage?
• Additional notes:
• Where are you getting the prop? Is it an item that you have in stock, or do you have to buy it? Does it need to be special ordered?
• Who is responsible for acquiring the item?
• If it is borrowed, who does it have to be returned to after the show?
• Does it need any special care? (e.g. Is it a food prop that needs to be refrigerated? Is it a prop weapon that needs to be locked up in between performances?)
• Is it consumable? (Meaning you’d need at least one for every performance because the prop is eaten, destroyed, used up, or otherwise unusable from performance to performance.)
• Complete?
• Do you have the item? If so, mark it as complete!
2. Go through the entire script page by page, making notes on your spreadsheet of every item mentioned, as well as any inferred items. For example, a stage direction might say “the phone rings” and you would write down that there needs to be a phone in such-and-such scene.
3. Once you have created your initial script scan, sit down with the director and/or stage manager and go through the props list to see if any props have been added or omitted. From the example above of “the phone rings,” the director may indicate that the actor actually goes offstage to answer the phone, so an actual phone prop is not actually necessary.
4. If any props have been added to the list that were not originally noted in the script, add the prop to the list in the appropriate order relative to the other props.
5. You may wish to upload the list to a shared system (such as Google Drive) so the relevant crew members (e.g. director, stage manager, props head, props team members) can access and update the file in real time. Then when it’s show time, print the list and post it near the props table to use as a checklist and ensure every prop is accounted for.

Acting
The Running List: What It Is and Why You Need It
An organized backstage is a calm backstage, and a running list can help keep things running smoothly during a production. What is a running list? It’s a scene-by-scene breakdown of scene changes and transition notes, prop entrances and exits, and quick changes, in list form (often colour-coded). It indicates who is in charge of each task and when it needs to happen in the show. It is pinned up in a common backstage area for easy access, to assist backstage team members in knowing what comes next in the show. It is especially important and useful in school shows and community theatre productions when you may have different people (whether that be student crew members or parent volunteers) assisting backstage on different nights. But even if you have the same crew for each performance, it is really helpful to have all that crucial information available at a glance.
Creating a running list can be a bit time-consuming, but your backstage crew will love you for it!
How to create a running list:1. Go through your script, scene by scene. List each scene by act and scene number. Include the title of the scene and/or the location of the scene, and any musical numbers performed in the scene if the show is a musical. If your show doesn’t have specific scenes, break down the acts into smaller beats, and indicate an important occurrence in the scene (such as “the chase scene” or “the balcony scene” or “Mrs. White’s death scene”) so the scenes are easily identifiable. This helps the crew keep the scenes straight, especially if they are less familiar with the show. It is also useful for younger or less experienced cast members, to keep the show in order in their minds. Include all scenes, even scenes that don’t require any changes, as this may change during technical or dress rehearsals.
2. For each scene, note any changes. Include things like set changes, transition concerns, props coming on or off (and who uses each item), quick costume changes, and preparations that need to be made for upcoming scenes. For example, if you know that a makeup table needs to appear onstage in Scene 5 with a mirror and makeup items on it, you might want to note in Scene 3 that the table needs to be prepped at that time so it’s ready for Scene 5.
3. Make note of what happens before and after the show. Be sure to also make note of what needs to happen pre-show (floors swept and mopped, props pre-set, etc.), during intermission, and post-show (clean-up).
4. I usually identify students by their own names in the running list (such as “QUICK CHANGE – Grace and Ethan into golf outfits”) but you may want to identify them by character name. Use whatever works best for your show, but be consistent in your notes.
5. Leave room in the margins and spaces between each scene for backstage teams to add their own notes. They may find that something was missed or added, or they might discover a better way or time to do a certain task, so allowing them space to note these changes will only make for an easier backstage process! Include page numbers, as well, at the top of each page. Running lists can often be quite long, depending on how many notes you need to include, so including page numbers will help to keep everything in the correct order. It’ll also be easier to notice if a page has gone missing.
Challenge your students to create a running list for their show. Forward thinking and attention to detail are musts for this exercise!

Directing
Pros & Cons of Callbacks
Imagine this: You’ve just completed your audition for the school production. You’re feeling really confident and happy with your performance. You can’t wait to find out who is going to be playing what role. But wait! It turns out that sometimes there’s an extra step before casting is released–the callbacks!
A callback is an invitation to the actor, from the director of a show, to take the next step down the audition path. It means that the director has seen something in an actor that they liked and wants to see them again. Callbacks can be extremely useful in casting a show, but they aren’t always necessary for every production.
Are you considering having callbacks for your next school production? Here are some pros and cons to consider.
PROSCallbacks give you a chance to see students again.Depending on how many students audition, it can be difficult to make casting decisions based on one short interaction with them. Also, some kids don’t always give the strongest audition performances, despite their talent. Having callbacks gives you the opportunity to see students perform again, often in a different situation. Callbacks can consist of reading from the script, presenting different audition pieces, a dance or movement exercise, improvisation–whatever works best for your production.
Callbacks can confirm or alter your casting decisions.Here’s a scenario: You think that Maya is perfect for a certain role in your show. She’s a senior, has lots of experience, and is a confident performer. But then Katie really surprised you with her audition. She’s only in grade 10 but she really worked hard and you can see a spark there. Calling both students back can give you more focused time with them and help you to make that tough choice. Have students read the same scene and see how their performances stack up.
Callbacks can help to check chemistry between students.Lots of shows have character pairings that are integral to the plot of the show, like romantic relationships, family members, or even rivals. Callbacks can give you the chance to try different pairings to see what works well. Try having different pairs read scenes together, and then mix up the pairings and try them again. You’ll have a clearer vision of what pairings work well (or, don’t work at all!).
Callbacks can assess the dedication of the students involved.Callbacks are a great way to gauge students’ attitudes and how committed they are to the project. Are they willing to spend another day trying to get the part? Are they happy to have gotten called back, or are they upset that they weren’t given the part outright? Are they organized enough to get themselves to the callback? Have they taken steps to prepare for the callback?
CONSCallbacks take more time out of your schedule.If you do decide to hold callbacks, you will need to plan ahead. You will have to arrange another date to hold the callbacks, and ensure you have a venue or location booked. If you need scenes or sides, you’ll have to prepare them in advance. You will also have to decide what course of action you will take if a student you’d like to call back cannot attend the callback session. Will you arrange an alternate time to see them, or will that take them out of the running?
Callbacks can be the cause of emotional rollercoasters for your students.There are many emotional responses your students might feel in regards to callbacks:
• If they get called back and then don’t get “that” part they had their heart set on.
• If they get called back but then don’t get any part. (I have heard of this happening–you will need to be very upfront with your students on whether or not a callback guarantees a role.)
• If they don’t get called back at all–does this mean that they are in the show or not? (Some teachers may choose to only call back for some roles but not others–again, be clear with your students on whether a callback means they’re in or not.
The most important thing to remember is…The most important thing to remember when dealing with callbacks is to be very clear with your students. What do callbacks mean? When and where will callbacks be? What should students expect to do at the callbacks? Do they need to prepare anything in advance? Are you calling back for all roles or just some? Does getting a callback guarantee a role? If you don’t get a callback, does that mean the student is even in the show?
The more information you can provide your students, the easier callbacks will be for everyone involved!
Kerry Hishon is a director, actor, writer, and stage combatant from London, Ontario, Canada. View her blog at www.kerryhishon.com.